What to Do When Your External Hard Drive Says It Needs to Be Formatted
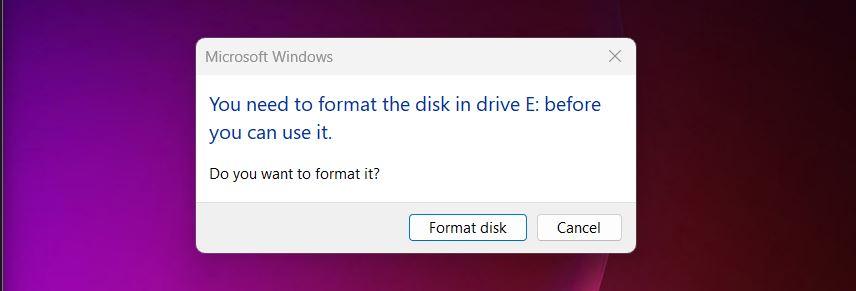
Have you plugged in your external hard drive and seen the message “You need to format the disk in drive before you can use it”? It’s one of the most common drive issues out there. There’s always a post online from someone asking what to do next.
Well, that’s exactly what you’ll find below.
We’ve pulled together practical steps, reliable tools, and solid methods to help you figure out what’s going on and what to do next.
Why Windows Is Asking You to Format Your External Hard Drive
Let’s start with why Windows is even asking you to format the external drive in the first place.
This usually means your computer can’t read the file system on the external hard drive. It could be corrupted, missing, or using a format Windows doesn’t understand. That’s when it throws up the format prompt; Windows simply can’t make sense of what it’s seeing and offers to start fresh with a clean, empty external drive.
Here are some of the usual suspects:
- The file system got messed up. Maybe the drive was yanked out without ejecting it, or your PC crashed mid-transfer.
- The formatting was never finished properly, or it was done in a way Windows can’t recognize (like formatting it for a Mac).
- There are bad sectors or signs of physical damage that confuse the system.
- Malware or a virus scrambled the structure of the drive.
- Or it’s a brand-new drive that hasn’t been formatted yet (if that’s the case, go ahead and format it, and that’s basically it for you).
Now, most people who search for answers to this problem do it for one reason: they’ve got important files on that drive. Photos, work stuff, maybe backups. And they know that if they click “Format,” those files are gone. That’s why it’s worth taking a smarter route first.
First Steps to Take
Here’s a basic checklist we’d suggest before doing anything else:
- First, don’t hit that Format button. Skip it for now, even if Windows keeps insisting your external hard drive is asking to format before use.
- That’s how people lose files they could’ve easily saved. Obviously, if there’s nothing important on the drive, go ahead. But most folks reading this aren’t in that boat. If you do care about what’s on there, even a little, hold off.
- Next, try to plug that drive into another computer. If you have access to both Windows and macOS, even better. A quick test like that can tell you if this is a real drive issue or just a file system mismatch. Here’s the deal: Windows and macOS each prefer different file systems. Windows typically uses NTFS. Macs lean toward APFS or HFS+. If the drive is formatted in something the current system doesn’t fully support, like APFS on Windows, it might not show up at all. Windows might see it as RAW and suggest formatting, even though the data is still there. On the flip side, if the drive is using exFAT, both Windows and macOS should read and write to it without issues. exFAT is the most flexible format for drives you plan to use across different platforms. If yours was using exFAT and it’s now unreadable, then we’re probably dealing with corruption, not a compatibility problem.
- Also, take a moment to check the drive itself. Examine your external hard drive for any visible signs of physical damage. Look for dents, cracks near the connectors, or any signs of liquid intrusion. If it’s been dropped or exposed to moisture, that could be the root of the problem. Physical damage can lead to bad sectors, connection issues, or a total failure of the drive.
There are cases where the problem is caused by serious physical damage, but more often, it’s a logical issue. That means the data structure on the drive is damaged, not the hardware itself. And that’s something you can often fix yourself with the right tools.
But before we get into any of the fixes, let’s talk about your data first.
How to Recover Data from an External Drive That Needs to Be Formatted
If your external hard drive is asking to format and you actually care about the files on it, start here.
Yes, there are some fixes that can make your drive usable again without losing anything. But nobody can guarantee that those fixes will work flawlessly. In fact, trying to “fix” the drive before data recovery could make things worse; just take a look at what sometimes happens with the CHKDSK utility. A failed repair attempt can overwrite file structures, damage partition data further, or make recovery way harder than it needs to be.
So here’s the safer move: recover your files first, then deal with the repair.
📝 By the way, if you already clicked “Format” and now your disk looks empty. This method still has a good chance to pull your data. A quick format doesn’t actually erase the files; it just clears the file system map. As long as new data hasn’t overwritten your old files, recovery software can still dig them out.
To retrieve your data, we’ll use our partner software, Disk Drill. It shows solid results across pretty much every file system you’ll run into: NTFS, exFAT, FAT32, HFS+, APFS, ext4, and more. Whether the drive was used on Windows, macOS, or even Linux, Disk Drill can usually recognize it and scan it.
On top of that, it’s easy to use and it includes a few extra features that come in handy when your drive is acting up. Let’s get started:
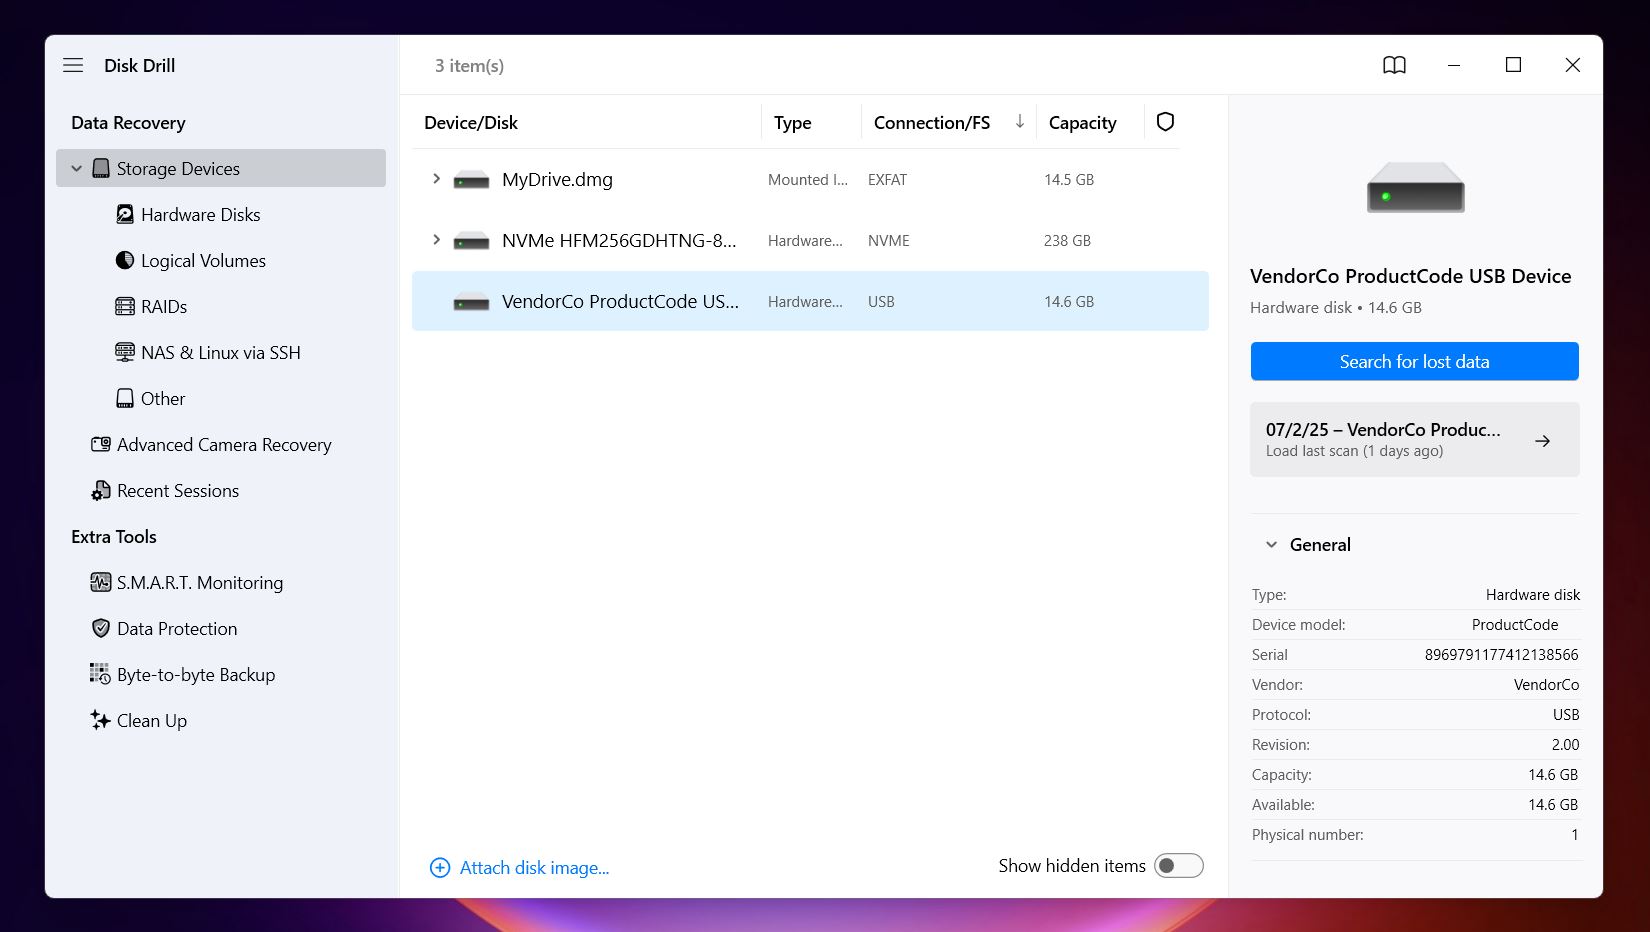
- Download the latest version of
Disk Drill and install it. Launch the app, and you’ll see a list of
available storage devices. If your external drive isn’t showing a name or
label, look at the size and manufacturer info to identify it.
- Next step, we’d suggest creating a full disk image before running the scan. This
gives you a safe copy of the entire drive to work with. That way, if the drive is on
the edge (and an error like this can be a warning sign), you're not stressing it
further or risking data loss mid-recovery. It’s the “better safe than
sorry” move. Sure, you can scan the drive directly, and Disk Drill
supports that. But if you’ve got enough free space on your internal drive to
store the image, it’s worth the extra few minutes. You’ll need a little
more than the full size of the external drive to save the image, so make sure
there’s enough room.
To do it in Disk Drill, go to Byte-to-byte Backup under Extra Tools, select the drive that’s giving you trouble, and choose Create backup.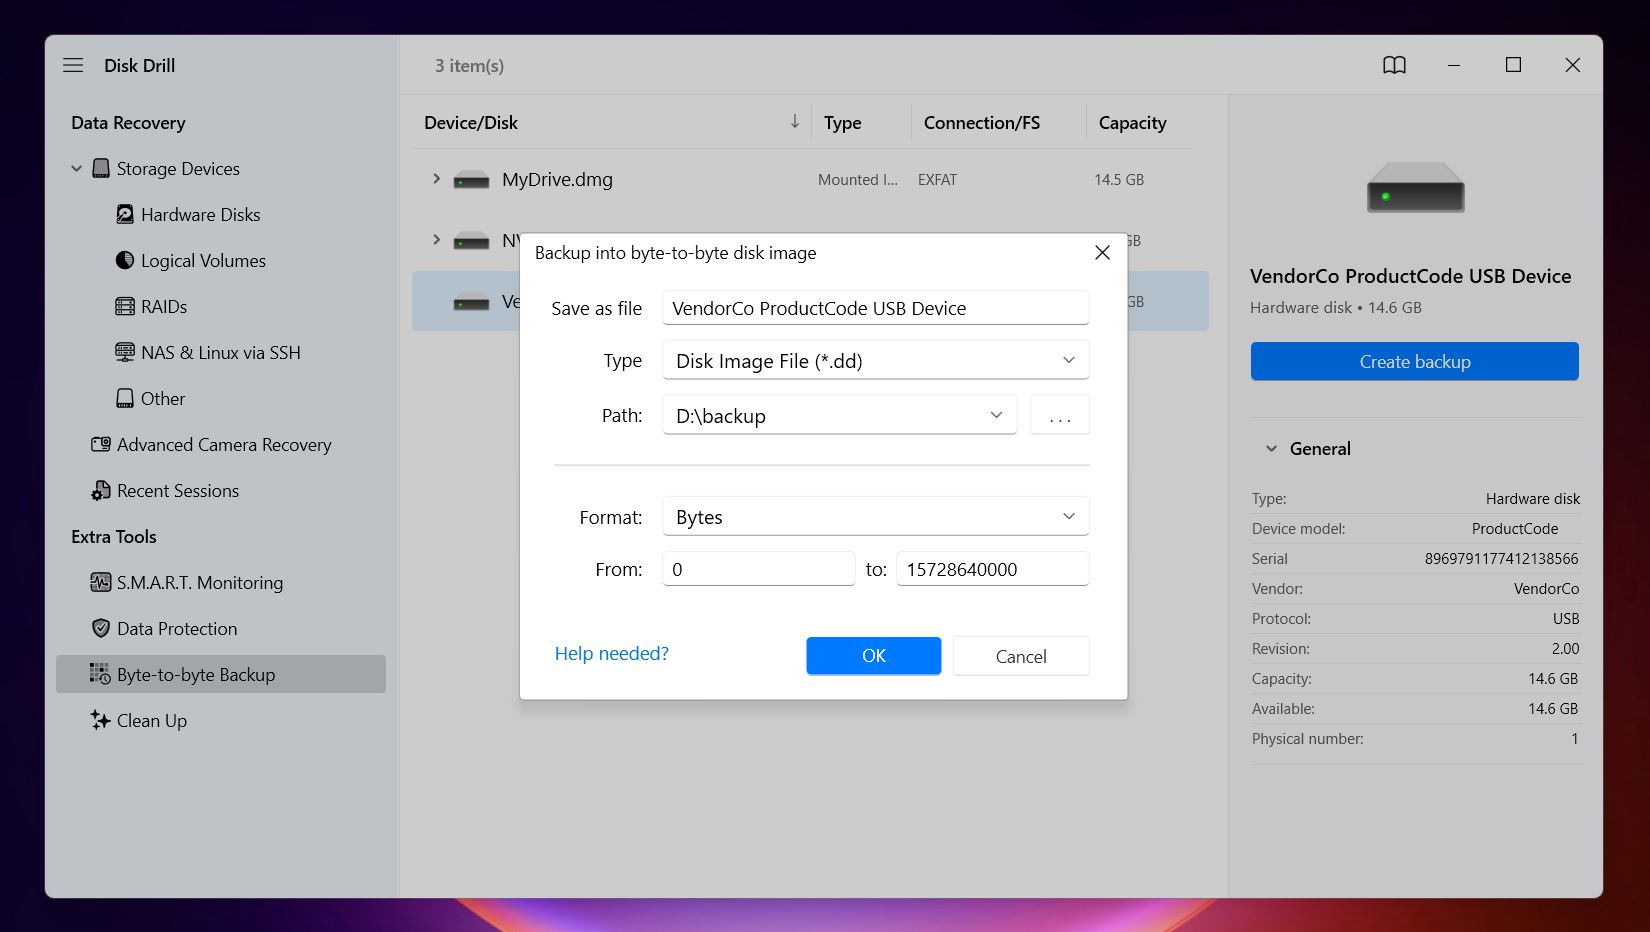
- Once your backup is done, return to Disk Drill’s main screen. From there, click Attach disk image at the bottom. This lets you load the image file you just created as if it were a real drive.
- Now, click Search for lost data.
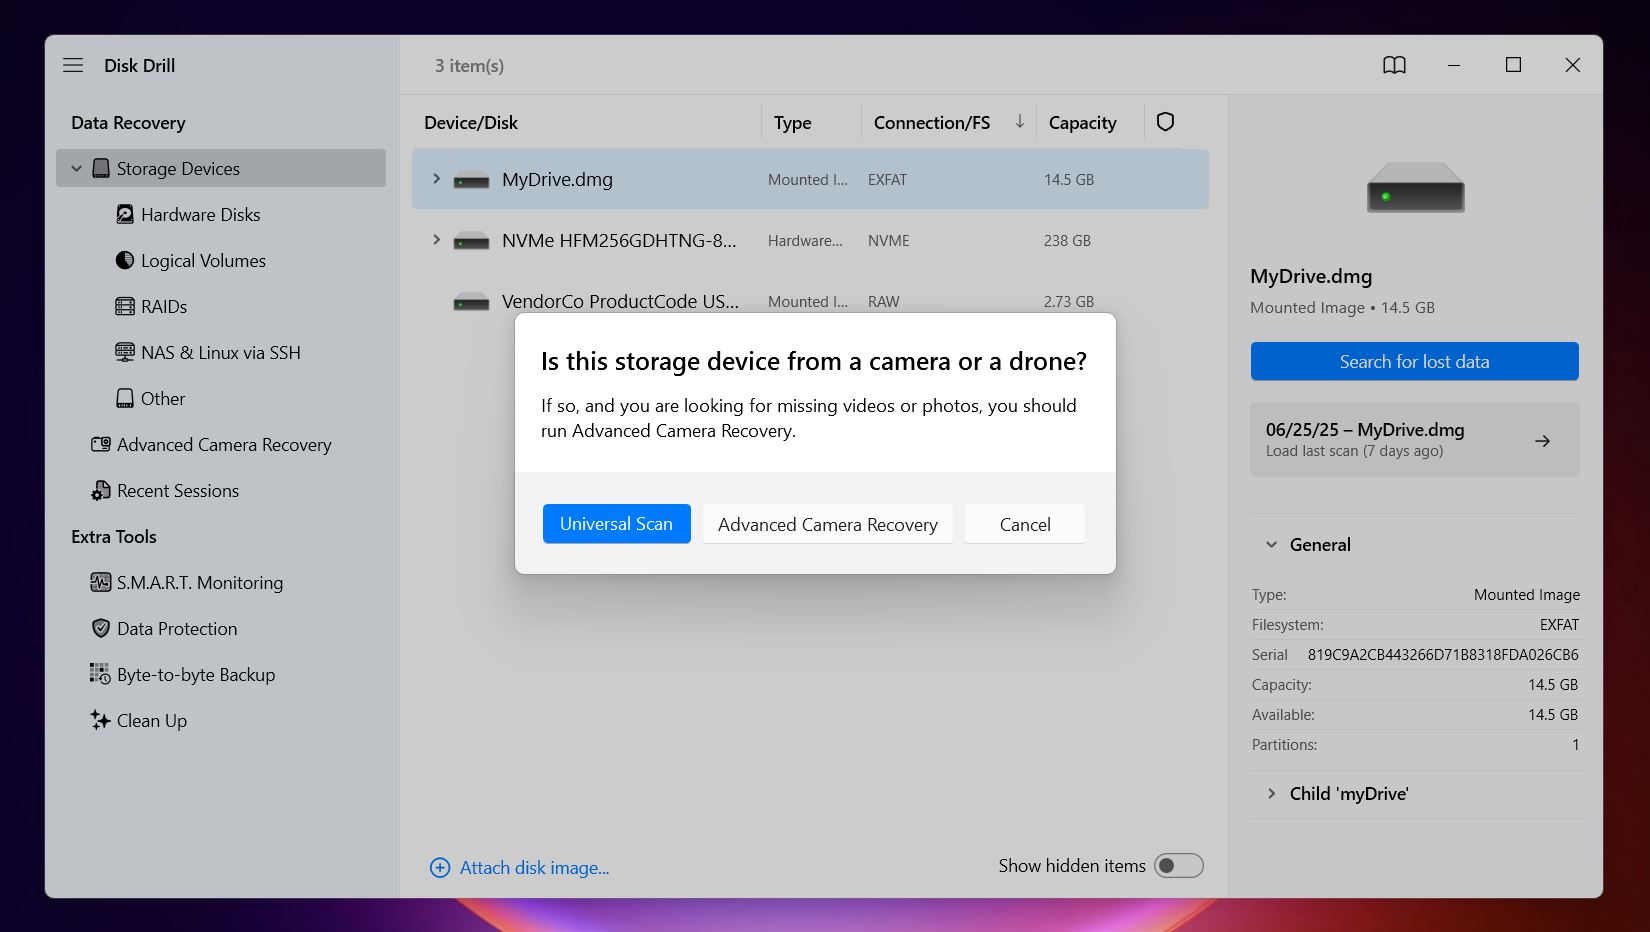 You might see two scan
options:
Universal Scan and Advanced Camera Recovery. Unless
you’re recovering video
files from a GoPro or DSLR, stick with Universal Scan.
It’s the default for a reason.
You might see two scan
options:
Universal Scan and Advanced Camera Recovery. Unless
you’re recovering video
files from a GoPro or DSLR, stick with Universal Scan.
It’s the default for a reason.
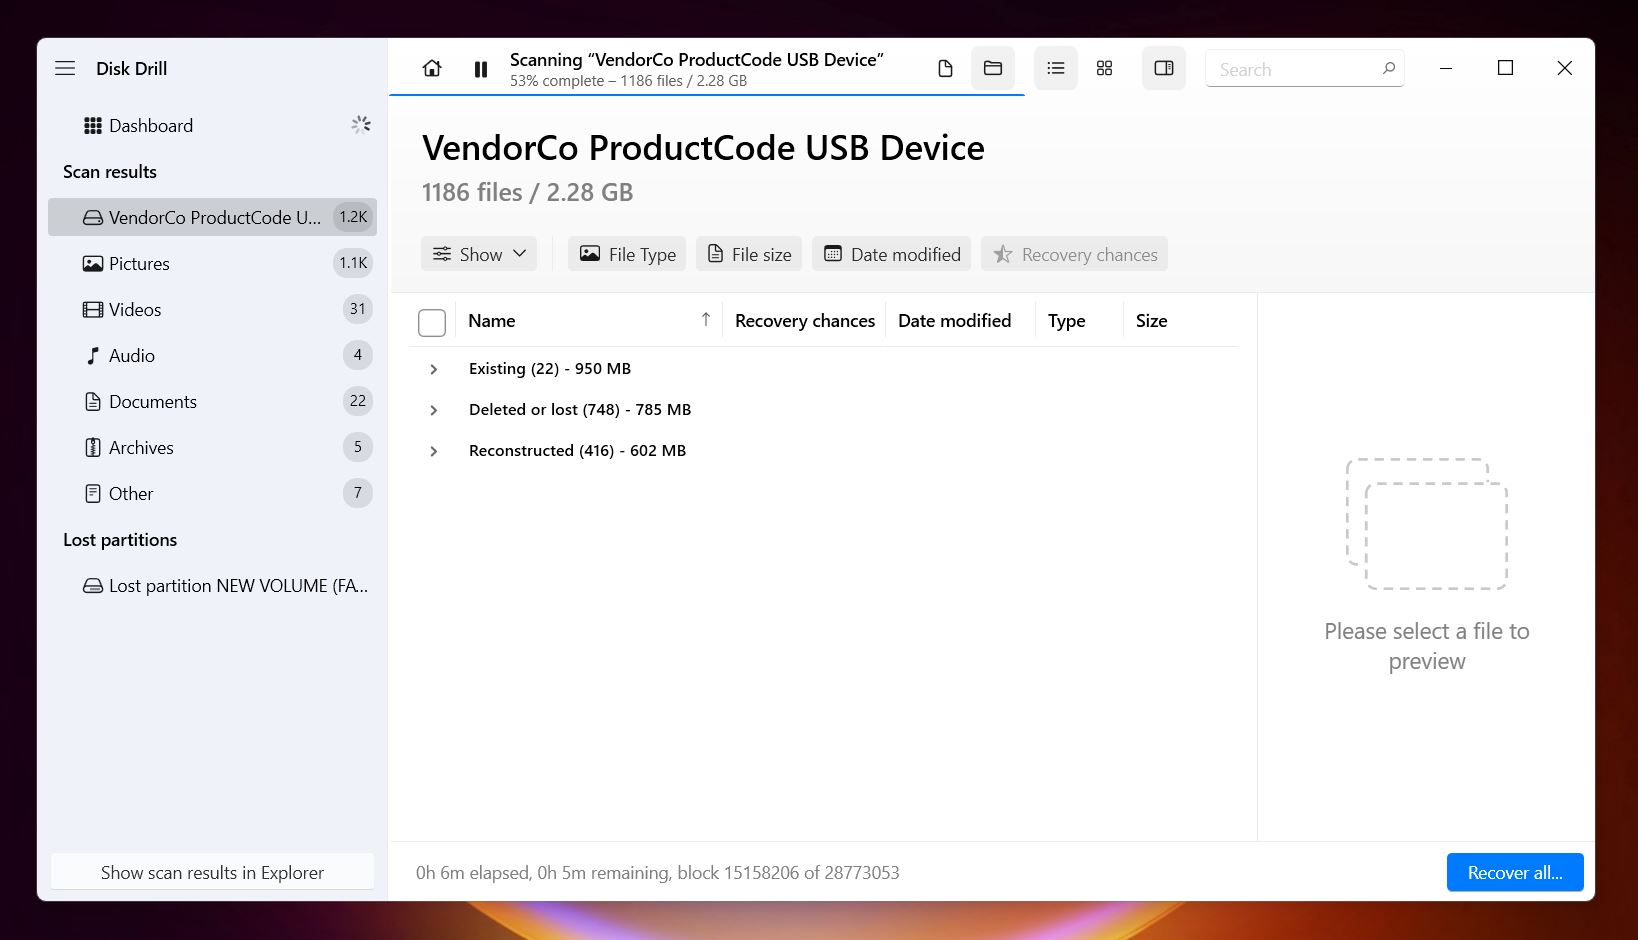
- You don’t have to wait for the full scan to finish. You can click Review found items to check what’s been discovered so far. Or, if you want to recover everything in one go, you can let the scan complete and then hit Recover all at the top. Both options work.
- Once you’re inside the results screen, Disk Drill splits the files into three
main groups: Deleted or Lost (these are files that were deleted or
disappeared), Reconstructed (these are files Disk Drill recovered
using its signature scan) and Existing (these are the files that
were already sitting on the drive before the error made it inaccessible. A lot of
what you’re looking for will show up here).
- As you click on a filename, you’ll see a preview thumbnail in the right panel.
If it opens and looks the way it should, that means the file is intact and ready to
recover.
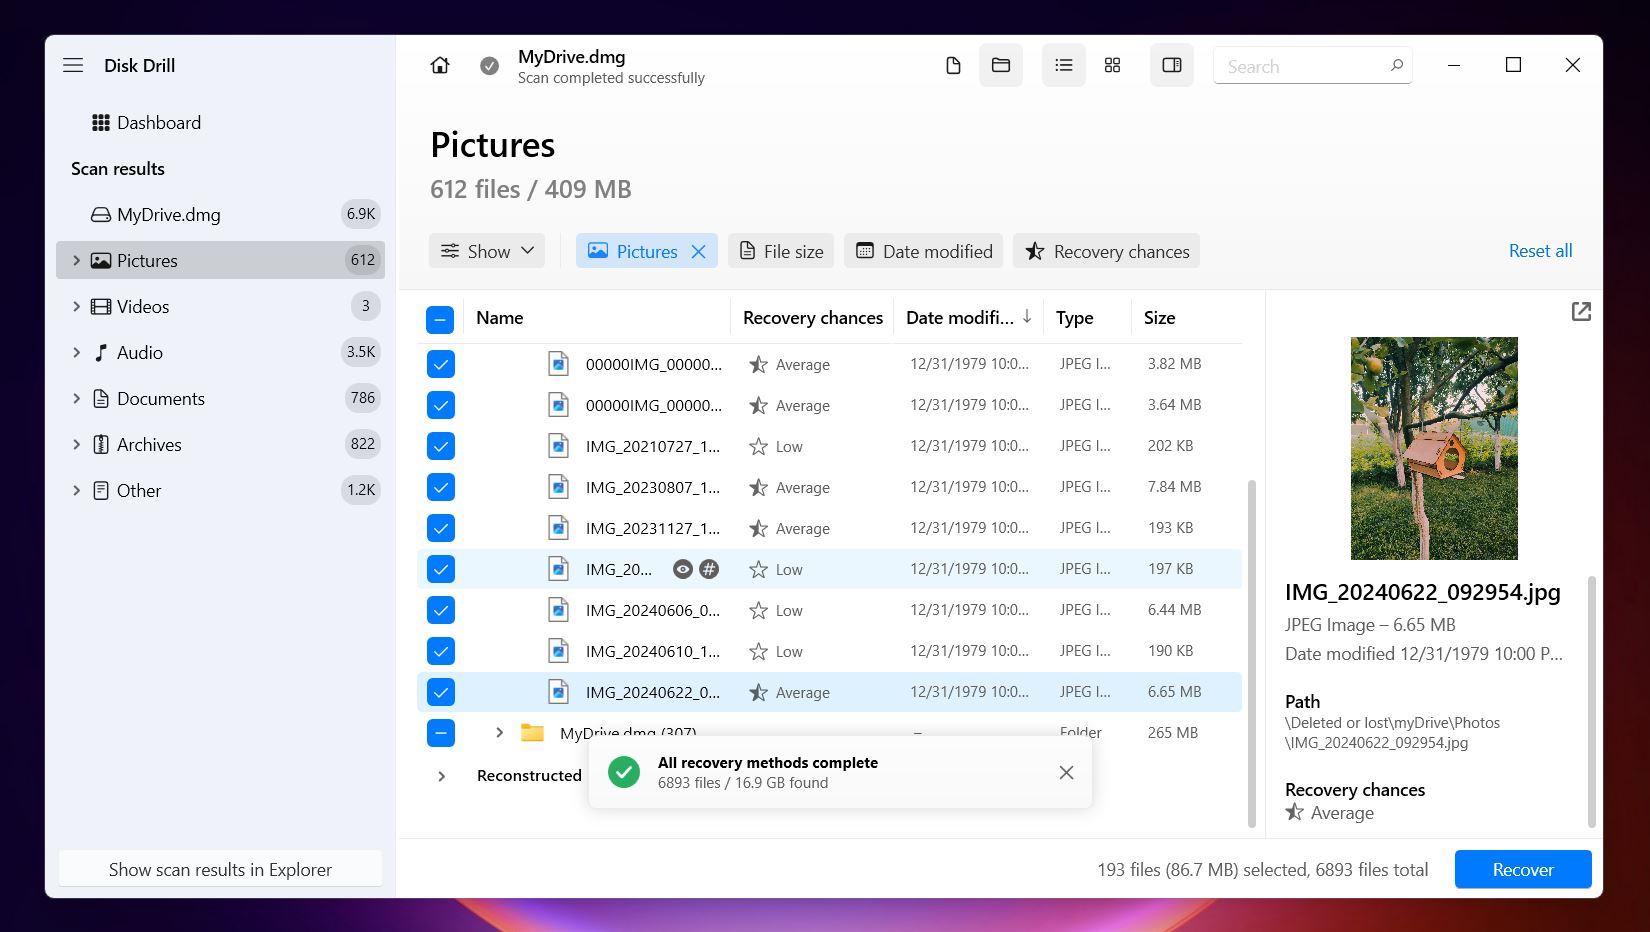
- Once you’ve selected the files (or entire folders) you want to recover, hit Recover. If you clicked Recover all earlier, you’ll land on the same screen.
- Now choose where to save the files.
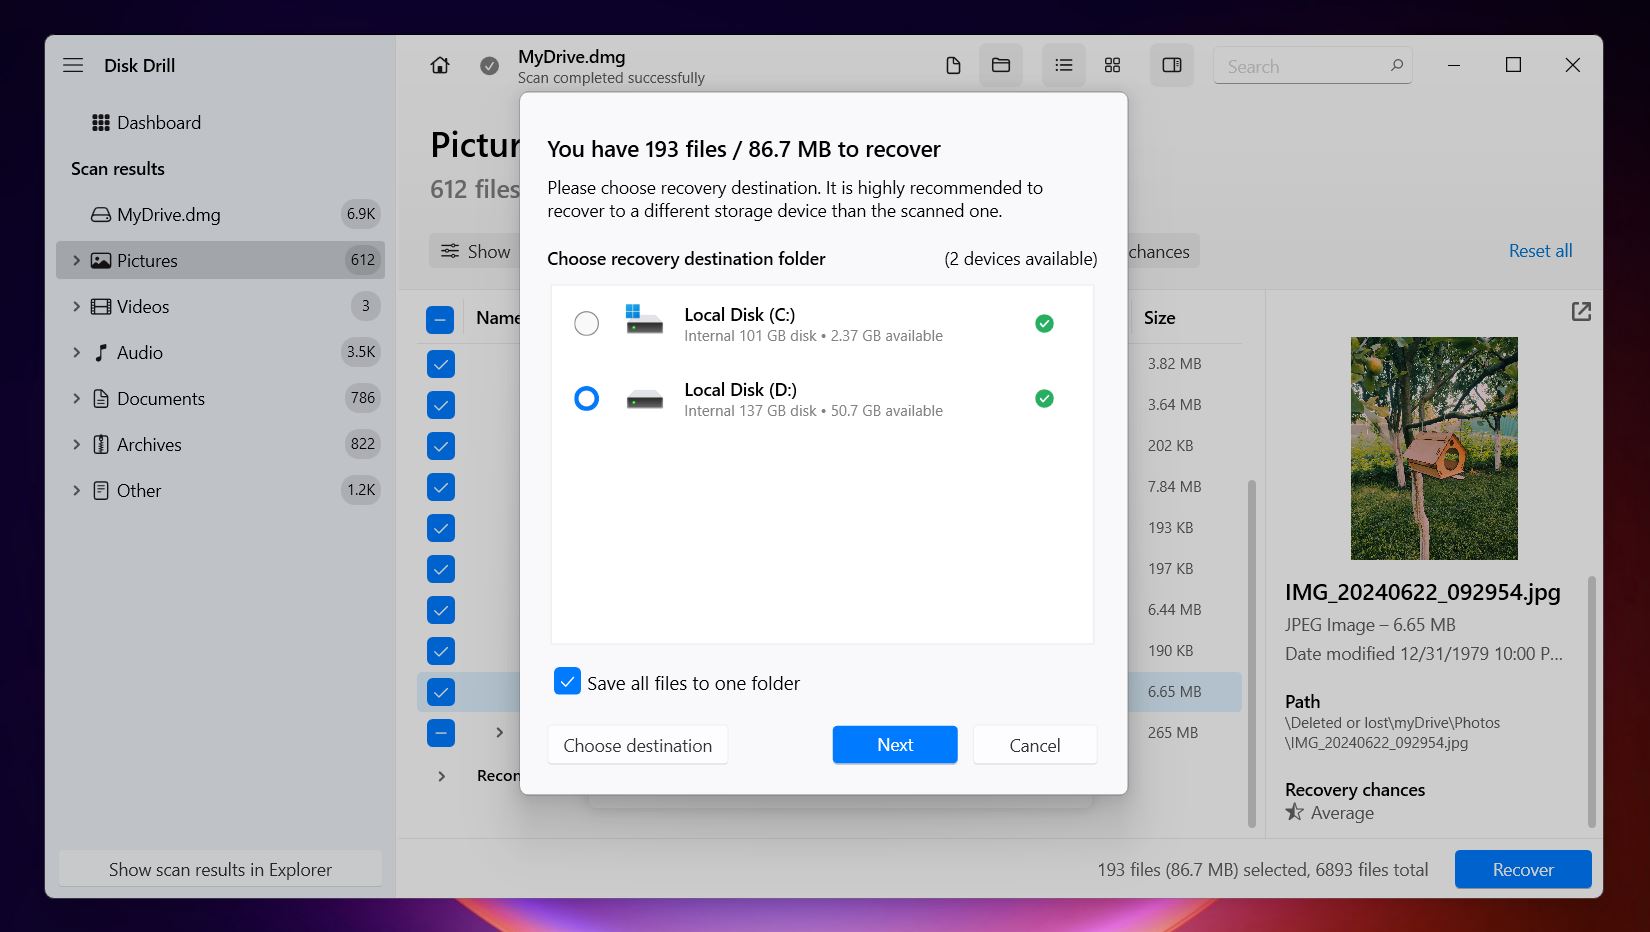 This part matters:
don’t
recover them to the same external drive that’s having issues. That could
overwrite data you haven’t recovered yet. Use a different external drive, a USB
stick, or your system’s main internal disk. Once you’ve picked the
location, confirm, and Disk Drill will start restoring your files. On Windows, Disk
Drill lets you recover up to 500 MB for free, which is more than enough for documents
and a chunk of photos or video. And you can scan and preview as much as you want, no
locked scans. So even if you’re still deciding whether to upgrade, you can
check what’s recoverable first.
This part matters:
don’t
recover them to the same external drive that’s having issues. That could
overwrite data you haven’t recovered yet. Use a different external drive, a USB
stick, or your system’s main internal disk. Once you’ve picked the
location, confirm, and Disk Drill will start restoring your files. On Windows, Disk
Drill lets you recover up to 500 MB for free, which is more than enough for documents
and a chunk of photos or video. And you can scan and preview as much as you want, no
locked scans. So even if you’re still deciding whether to upgrade, you can
check what’s recoverable first.
Now your data should be safe in a different location, separate from the problematic external drive. That’s already a huge win. You’re halfway there.
While you’re still in Disk Drill, it’s a good time to take advantage of another extra tool: S.M.A.R.T. monitoring. This feature lets you check the health status of your drive using built-in diagnostics from the hardware itself.
Find it under Extra Tools, click on S.M.A.R.T. Monitoring, and enable it. It might prompt you to install an additional driver; go ahead and do it. Once it's set up, you’ll see detailed info about your drive’s condition: temperature, bad sector count, spin-up time, and more.
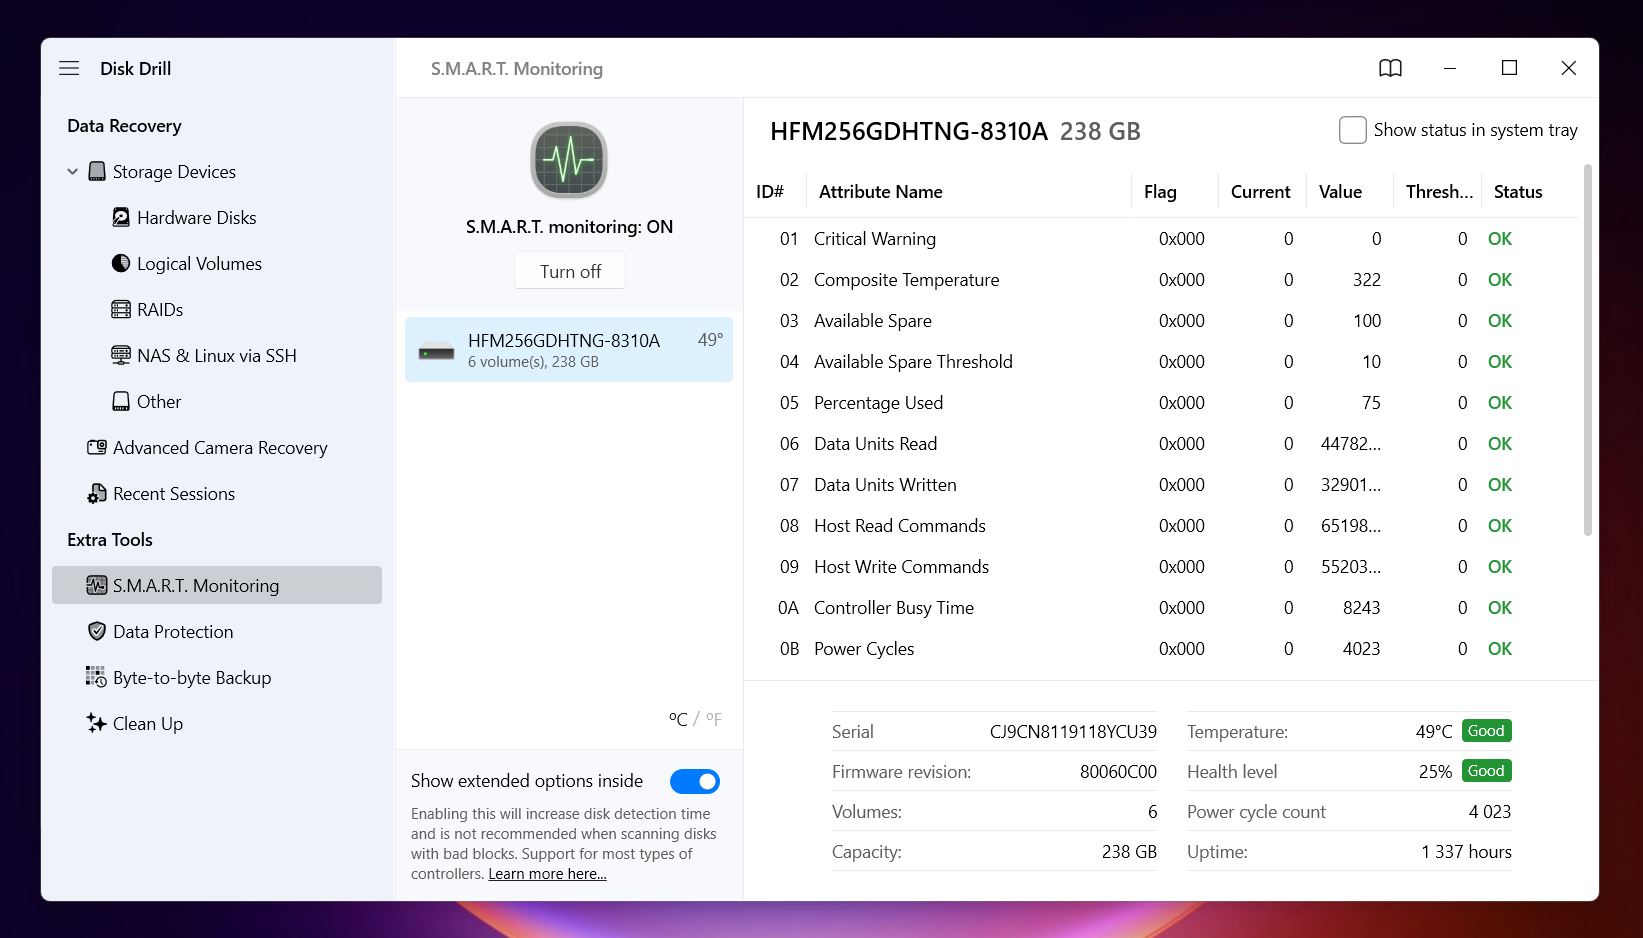
If all you see is “Good” in green, great, your drive just has a minor logical issue. Something you can fix, and once it’s resolved, you’re done.
But if you see warnings in red or anything marked as failing, that means the drive is compromised. You can’t fully trust it with important data from this point forward. You might still be able to get it working again, but it’s no longer safe for anything critical. It’s best used for temporary storage or testing, not long-term backups.
How to Fix the “You Need to Format the Disk in Drive” Error
Let’s go through the fixes that can help get your external hard drive back into usable shape without formatting it right away. Some of these are quick and easy, others a bit more technical. We’ll start with the simpler ones and work our way up.
Method 1: CHKDSK and Error Checking
Start with what’s built into Windows. If the problem is caused by minor file system corruption, these tools can sometimes fix it in a couple of clicks.
CHKDSK and Error Checking are basically the same tool: one’s the graphical version, the other is command-line. Both scan the drive for errors, try to fix broken file system structures, and can mark bad sectors so they’re no longer used.
If you’re not comfortable with command prompts, start with the Error Checking tool. It’s easy:
- Open File Explorer, right-click your external hard drive, and choose Properties.
- Head to the Tools tab.
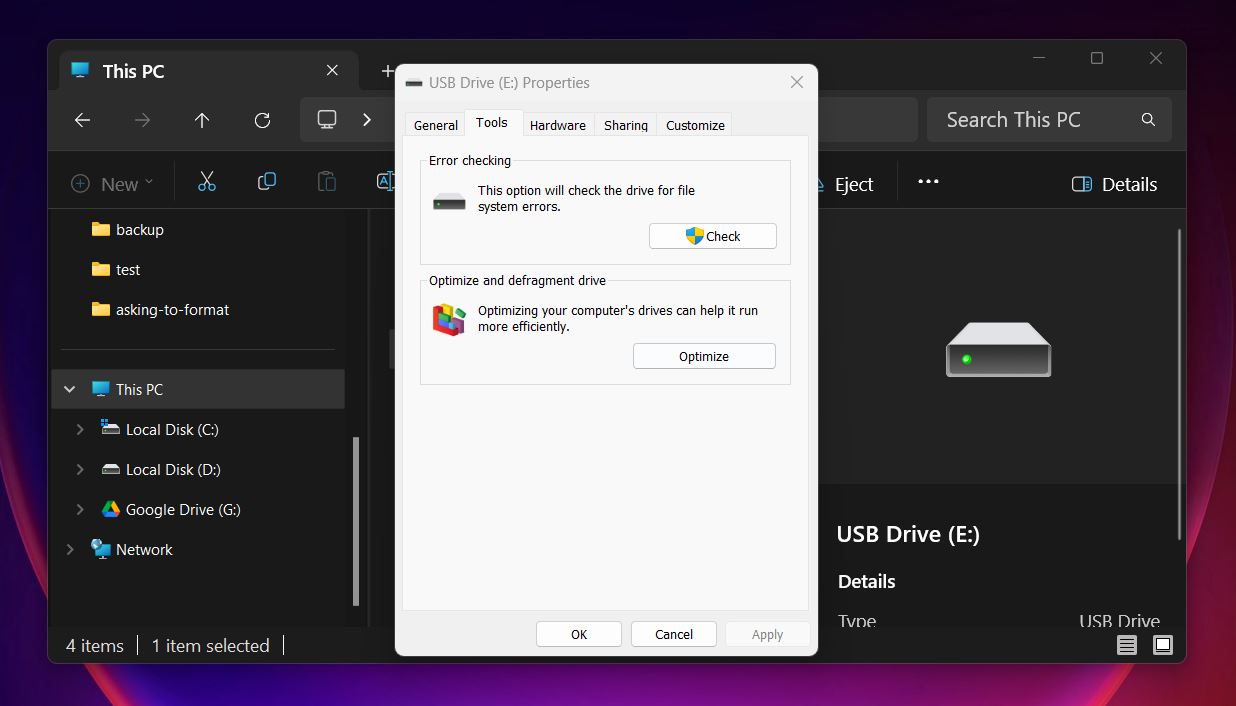
- Under Error checking, click Check, then confirm with Scan drive.
Windows will go over the file system and either fix small issues on its own or let you know nothing was found.
Alternatively, you can use CHKDSK directly through the command line or Windows Terminal:
- Open Command Prompt as Administrator (search “cmd,” right-click it, and choose Run as administrator).
- Type: chkdsk X: /f /r
(Replace X with the letter of your external drive.)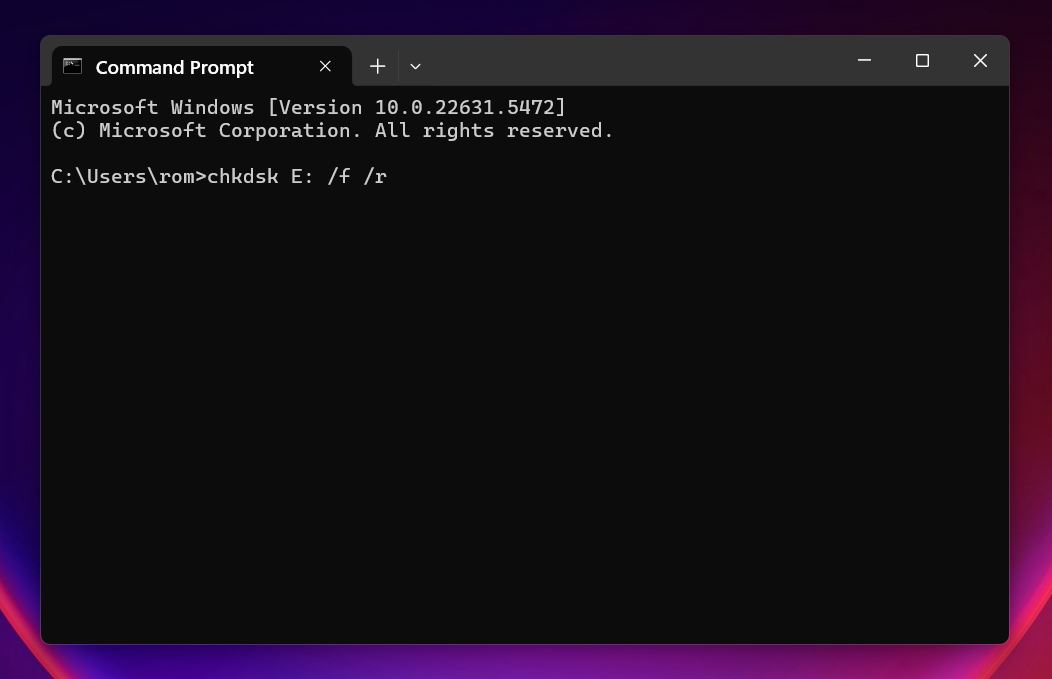
- Hit Enter and wait; it can take a while on larger drives.
This version gives you more control and a detailed view of what’s happening. The /f tells Windows to fix file system errors, and /r checks the entire surface of the disk for bad sectors.
These are simple fixes, and in some cases, they do work. But like we already mentioned, they’re not risk-free. Running a repair tool can lead to some data loss.
So before you try anything, make sure you’ve either backed up your data to your system drive like we showed earlier, or you’re okay with the possibility of losing a few files.
Method 2: Repair the Drive with TestDisk
This option isn’t as simple as Error Checking or CHKDSK, but it’s a lot more powerful if you’re dealing with a RAW file system or a missing partition.
TestDisk is a free, open-source recovery tool that works at the partition level. It doesn’t have a modern user interface (it runs in a terminal window), but don’t let that throw you off; it’s used by many people for a reason. It can rebuild partition tables, recover lost partitions, and make some RAW drives readable again.
Again, like with CHKDSK, there’s always some risk involved when you’re trying to repair a drive. TestDisk is powerful, but it’s still making changes to low-level disk structures. If something goes wrong, you could make things worse or lose access to your data for good.
So if you haven’t already pulled your data, this is the time to do it.
Here’s how to get started:
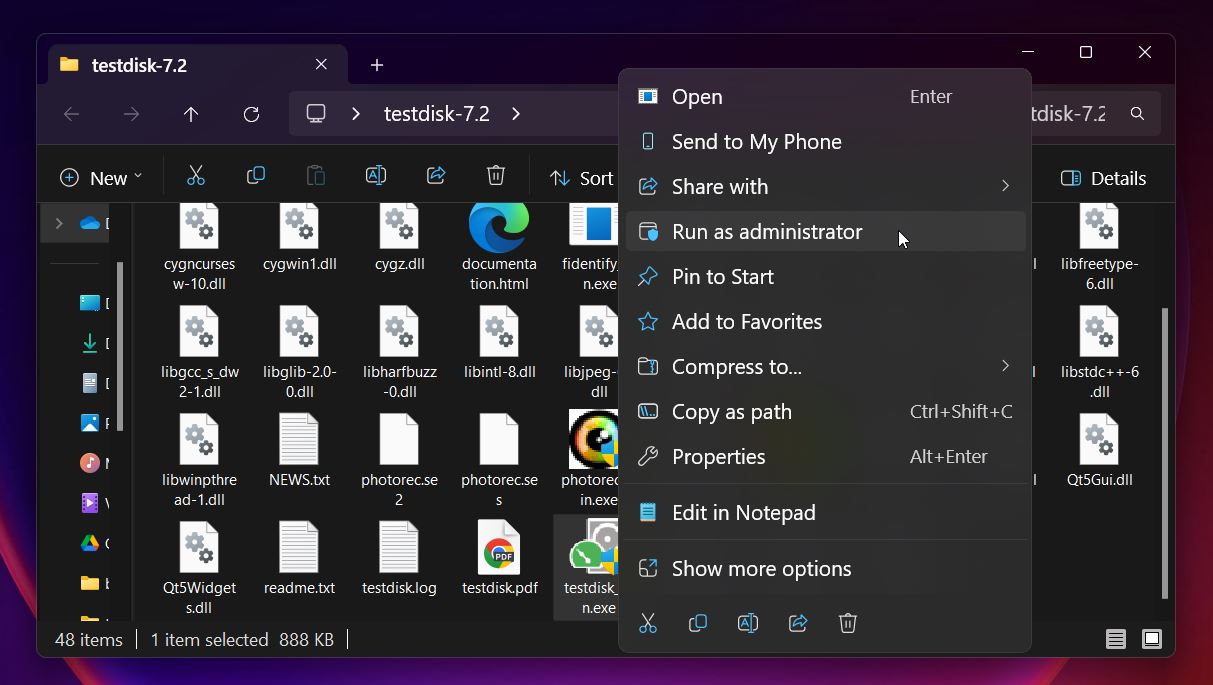
- Download TestDisk from the official site.
- Once the download finishes, unzip the archive anywhere on your system; you don't have
to install it. On Windows, right-click testdisk_win.exe and choose Run as
administrator.
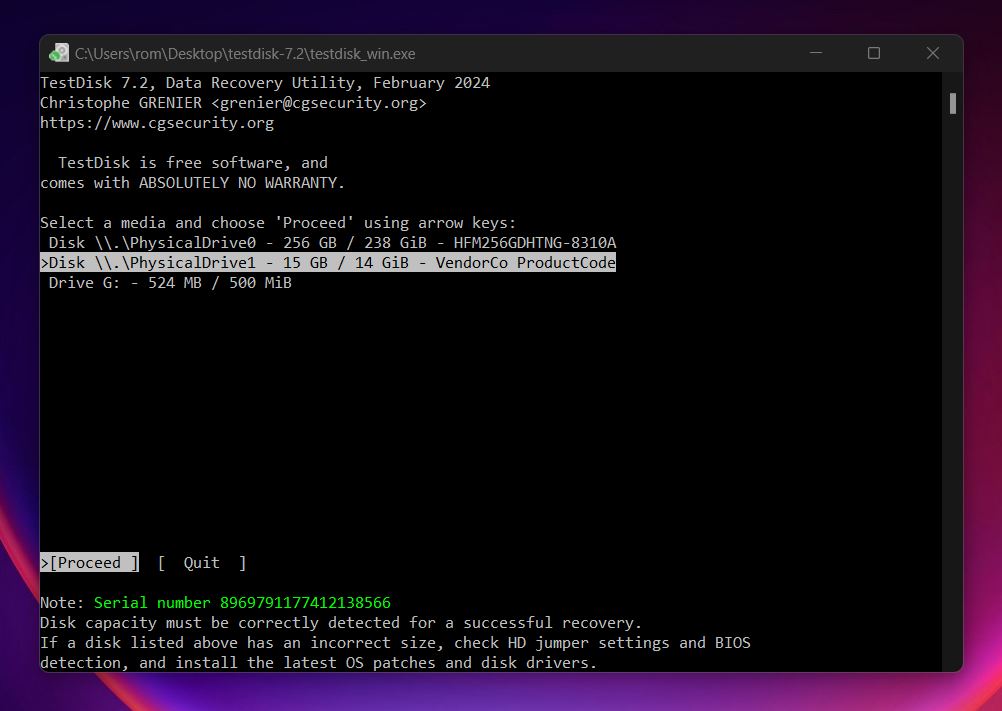
 The app opens in a
command-line window with a basic
text-based menu.
The app opens in a
command-line window with a basic
text-based menu.
- Select Create to start a new log file (or No Log if
you don’t want one). Use the arrow keys to select your external drive from the
list (match it by size if the label isn’t clear) and press
Enter.
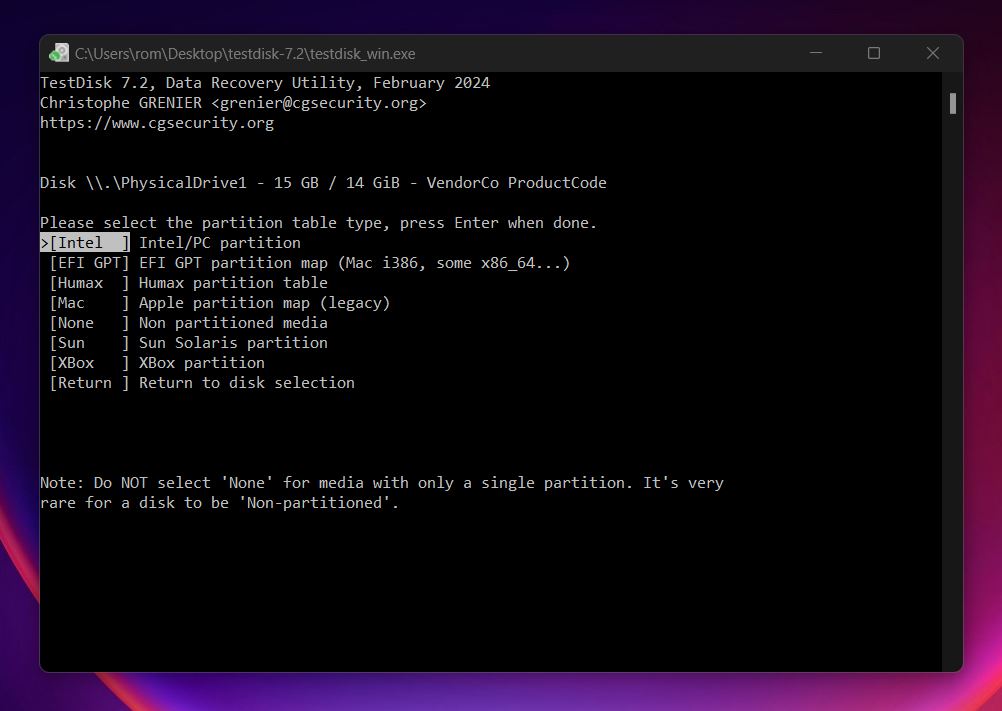
- Next, choose the partition table type. TestDisk usually detects it correctly. For most
drives, go with [Intel] for MBR-style disks or [EFI GPT] if the drive was used on a
newer system.
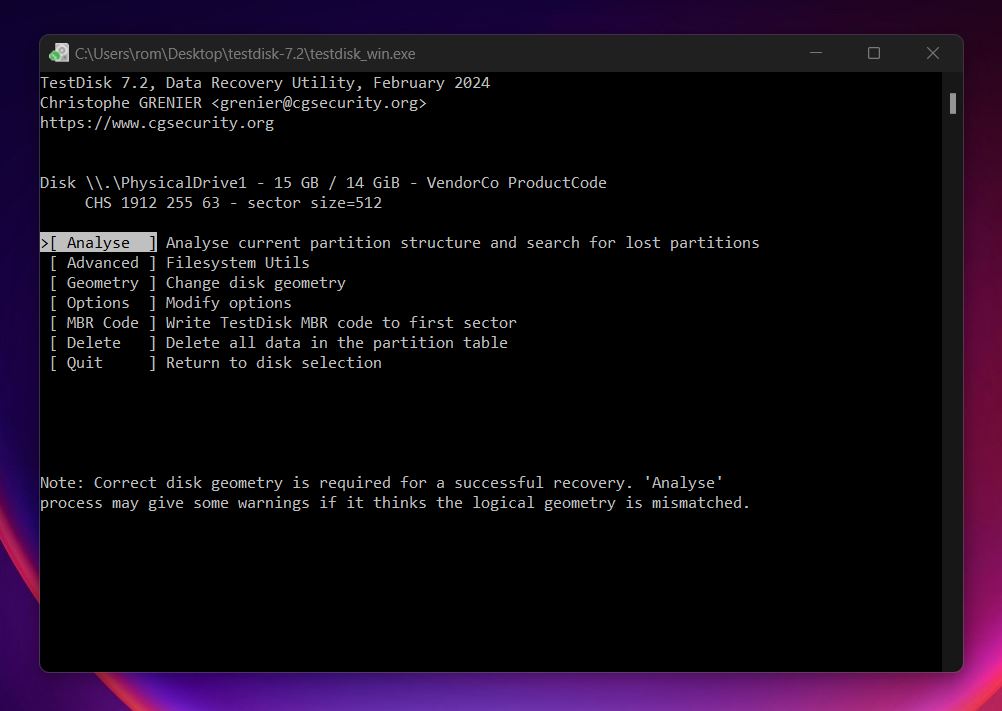
- Choose Analyse, and hit Enter to let TestDisk check
the partition structure. It’ll show what’s currently on the disk.
- Then select Quick Search and press Enter again. If
the missing partition shows up (look for familiar labels or types like NTFS or
FAT32), highlight it using the arrow keys.
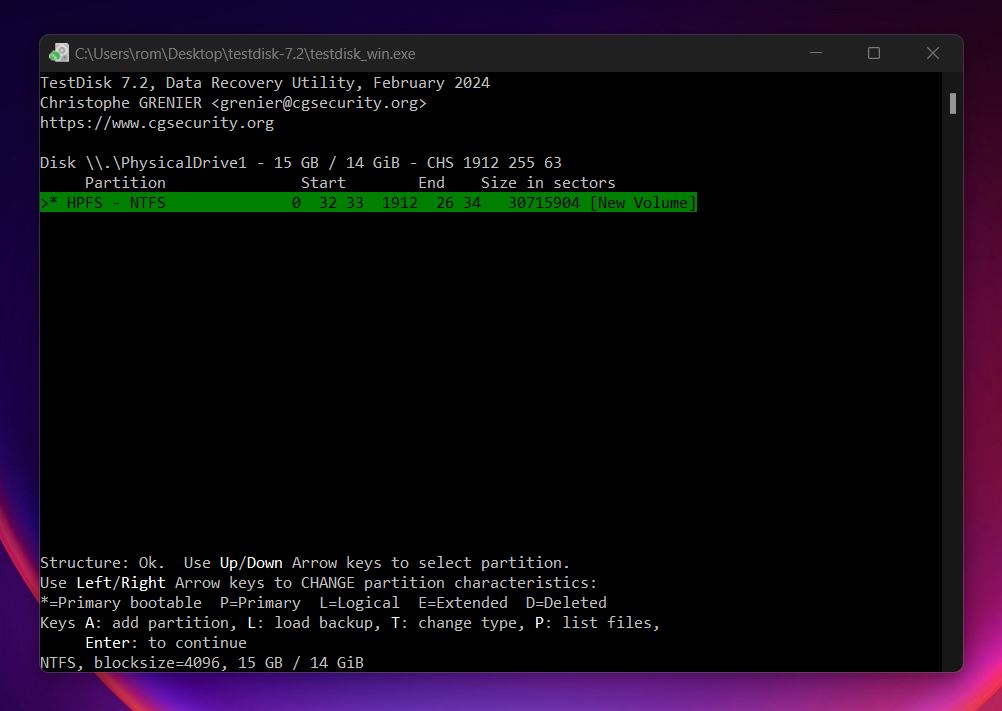
- Press P to browse the contents of that partition. If your files and folders appear, that’s a great sign; your data’s still there.
- If everything looks good, press Enter, then select Write to restore the partition to the drive. Confirm when prompted.
After TestDisk completes the write process, exit the program. You may need to restart your computer for the drive to appear properly in File Explorer. Sometimes it shows up instantly, but not always.
What to Do If None of the Fixes Work
If none of the methods worked for you, then your external hard drive needs to be formatted, there’s really only one thing left to do at that point.
And honestly, if you’ve already used a data recovery tool and got your files off safely, what’s really stopping you? You’ve already done the hard part. Formatting is a clean slate. It wipes whatever mess was confusing the system and sets the drive up fresh with a working file system.
📝 Note. Formatting won’t fix physical damage, but it often clears up logical problems once recovery’s done. So if you skipped our section on data recovery, go back and check it first (you’ll want to get your files off the drive before wiping anything). And while you’re at it, don’t forget to check the S.M.A.R.T. status like we showed earlier. It’ll give you a clearer picture of whether this external drive is still reliable or if it’s time to retire it.
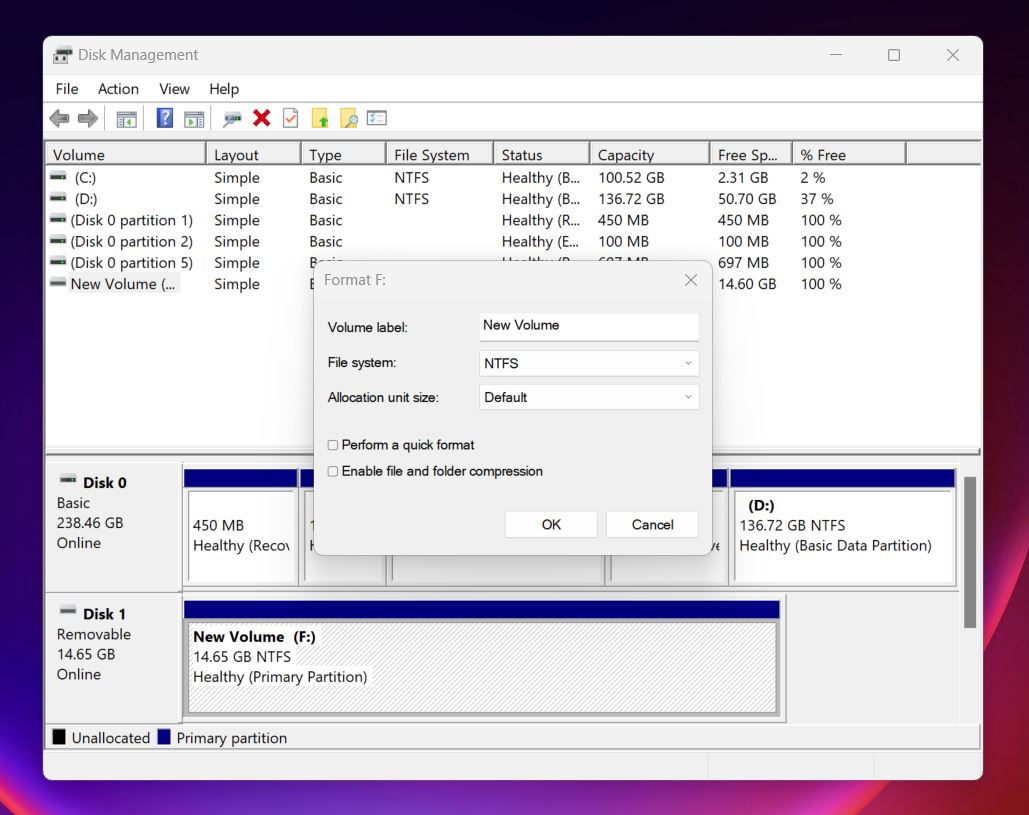
We recommend doing a full format (not a quick format) through Disk Management:
- Press Start, type disk management, and hit Enter.
- Find your external drive in the list. Double-check it’s the right one.
- Right-click the volume and choose Format.
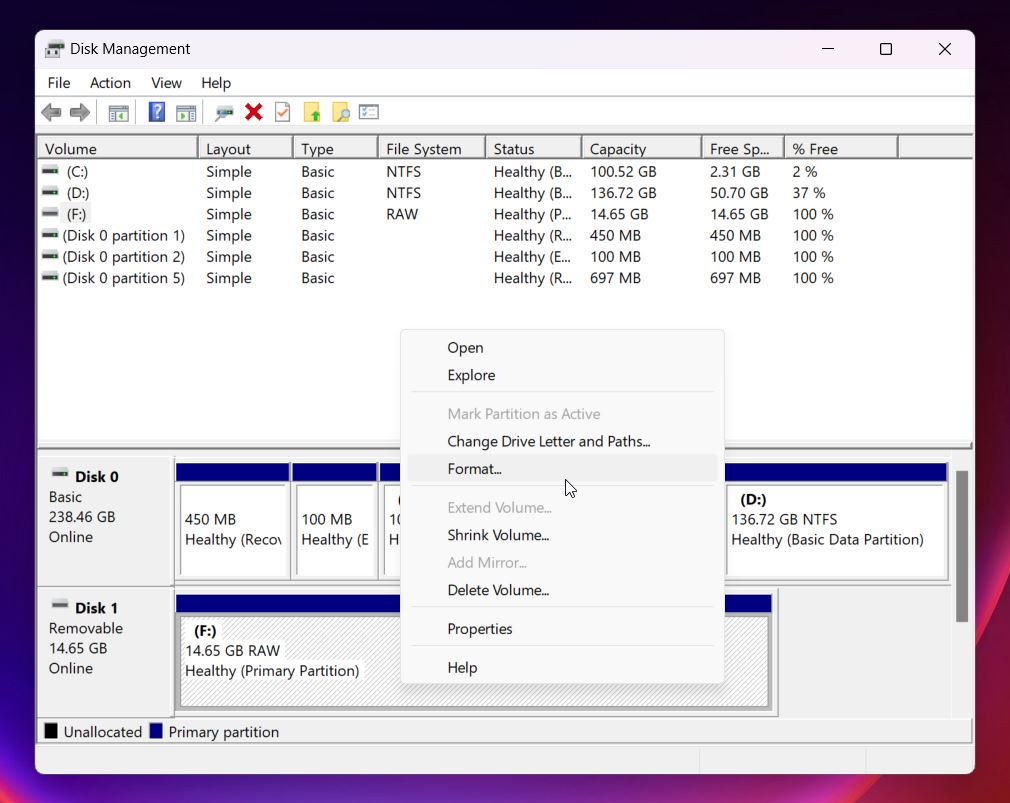
- Pick a file system: exFAT is great for drives you’ll use on both Mac and Windows; NTFS if it’s for Windows only.
- Uncheck “Quick Format” for a more thorough cleanup, then hit OK.
That’s it. If the format completes without errors, your drive should be usable again.
Now, about that Quick Format checkbox, we recommend unchecking it for a reason: Quick and Full Format are very different.
- A Quick Format only recreates the file system; it’s fast, usually done in seconds, but that’s about all it does. It doesn’t scan for problems, doesn’t touch bad sectors, and leaves the old data on the disk.
- A Full Format, on the other hand, is slower, but way more thorough. It not only rebuilds the file system but also writes zeroes across the entire storage space and scans for bad sectors. If it finds any, it marks them as unusable, so the system avoids them in the future. This is especially useful if you think the drive has been acting weird.
Final Words
Of course, there are cases where you might need to turn to a professional data recovery service; if your external drive is too far gone, that’s usually outside the scope of DIY.
But in our experience, 8 out of 10 cases are just good old logical issues, like file system corruption or lost partitions. These can often be fixed at home without any special hardware or deep technical knowledge. You don’t need to be a pro to safely recover your files or get your drive working again; you need the right tools, a bit of patience, and the willingness to follow a few steps.
There are also some rare cases where the drive refuses to be formatted, even if you go along with the prompt and try to format it through Windows. It just fails. In situations like that, a few users have had success with a third-party utility called HDD Low Level Format Tool. It performs a true low-level format (something Windows doesn't do), which can sometimes reset a stubborn drive that’s stuck in a weird state.
Just be aware: low-level formatting, like full formatting, wipes everything. There's no going back. That’s why we always recommend thinking about your data first, and fixes after. If you follow that simple rule, chances are you’ll avoid permanent loss and give yourself the best shot at recovery.