How to Recover Data from an exFAT Hard Drive
If you got in trouble with your exFAT drive and can’t access your files anymore, this guide’s for you. Maybe you accidentally deleted a file or folder you didn’t mean to (it happens). Or the entire exFAT partition disappeared. Either way, don’t write that data off yet; exFAT recovery is definitely possible. You don’t need to be an expert to get it back, you just need to know what to do (and what not to do) next.
What is exFAT?
Before we get into the exact steps, let’s quickly run through the basics.
exFAT stands for Extended File Allocation Table. It’s kind of like the middle ground between FAT32 and NTFS. You see it on a lot of external drives and SD cards because it works out of the box on both Windows and Mac (and even some gaming consoles and cameras). No compatibility headaches.
One of its biggest perks is file size support. FAT32 maxes out at 4GB per file and 8TB per partition. That’s fine for Word docs, but not great if you’re backing up 10GB 4K videos or entire photo libraries. exFAT, on the other hand, supports individual files up to 16 exabytes (yes, with an “e”), which is absurdly more than you’ll ever need.
The flip side is that exFAT isn’t the most resilient file system. It doesn’t have journaling like NTFS, so if something interrupts the connection while you’re transferring files, like yanking the USB cable too soon, it can easily get corrupted.
What to Do Before Starting exFAT Recovery
Let’s talk about what to do before you try to bring anything back.
Here’s a quick checklist for you:
- Stop using the drive immediately.
Seriously. Unplug it. Don’t try to open it again, don’t copy anything to it, and definitely don’t format it. When files are deleted (or lost in some other way), they’re often still sitting on the drive, it’s the index that gets messed up. Writing new data could wipe them out for good. - Get another drive ready.
You’ll need a different drive or large enough USB stick to store your recovered files. Never try to recover files directly onto the same exFAT drive you’re pulling them from. That’s how people accidentally overwrite what they’re trying to save. - Don’t run sketchy “repair”
tools.
It’s tempting to click the first thing that promises a quick fix, but not all repair apps are safe. If it doesn’t come from a trusted source, skip it.
And one last tip: move fast, but don’t rush. Go through the checklist, get everything set up properly, and take a minute to make sure you’re ready. Once that’s done, start the recovery and let the software do its thing.
How to Retrieve Data with exFAT Recovery Software
Now that you’re set up and know the ground rules, let’s go through the best ways to actually recover deleted files from exFAT.
We’re going to look at two tools that handle exFAT recovery really well: Disk Drill and TestDisk. They’re both solid, but they shine in different situations. So before we show you how to use each one, we’ll include a quick note to help you figure out which tool fits your scenario best.
We’ll start with the easiest option, and honestly, the one that applies in basically any scenario: Disk Drill.
Method 1: Disk Drill
💡 When to use it: If you accidentally deleted files from your exFAT drive, formatted it using the quick format option, or it got corrupted and you lost direct access to your files, but the drive still shows up in Disk Management (on Windows) or Disk Utility (on Mac), Disk Drill is a great place to start.
Disk Drill works on both Windows and Mac, and over the years, it’s shown consistently great results with exFAT recovery. Whether you’re pulling files off an SD card, a USB stick, or an external SSD, Disk Drill tends to dig up more recoverable data than most tools.
Here’s a quick look at what you get with it:
- Fast scan times.
- Quick and deep scan modes. If your exFAT drive is too damaged to rely on its file system, Disk Drill can still pull files based on file signatures alone. This works well for photos, videos, documents, and other common formats (around 400 file signatures).
- You can preview images, videos, PDFs, and more before the scan is even finished. No need to recover blindly and sort it out later.
- Free recovery on Windows; you can recover up to 500 MB without buying a Pro license. That’s often enough to grab your most important files.
Now let’s break down exactly how to use it to recover data from an exFAT drive:
- Download the latest version of Disk
Drill and install it.
- Once it’s installed, plug in your exFAT drive. This could be a USB stick, external SSD, SD card, whatever you’re trying to recover from.
- Open up Disk Drill, and it’ll scan your system for connected devices.
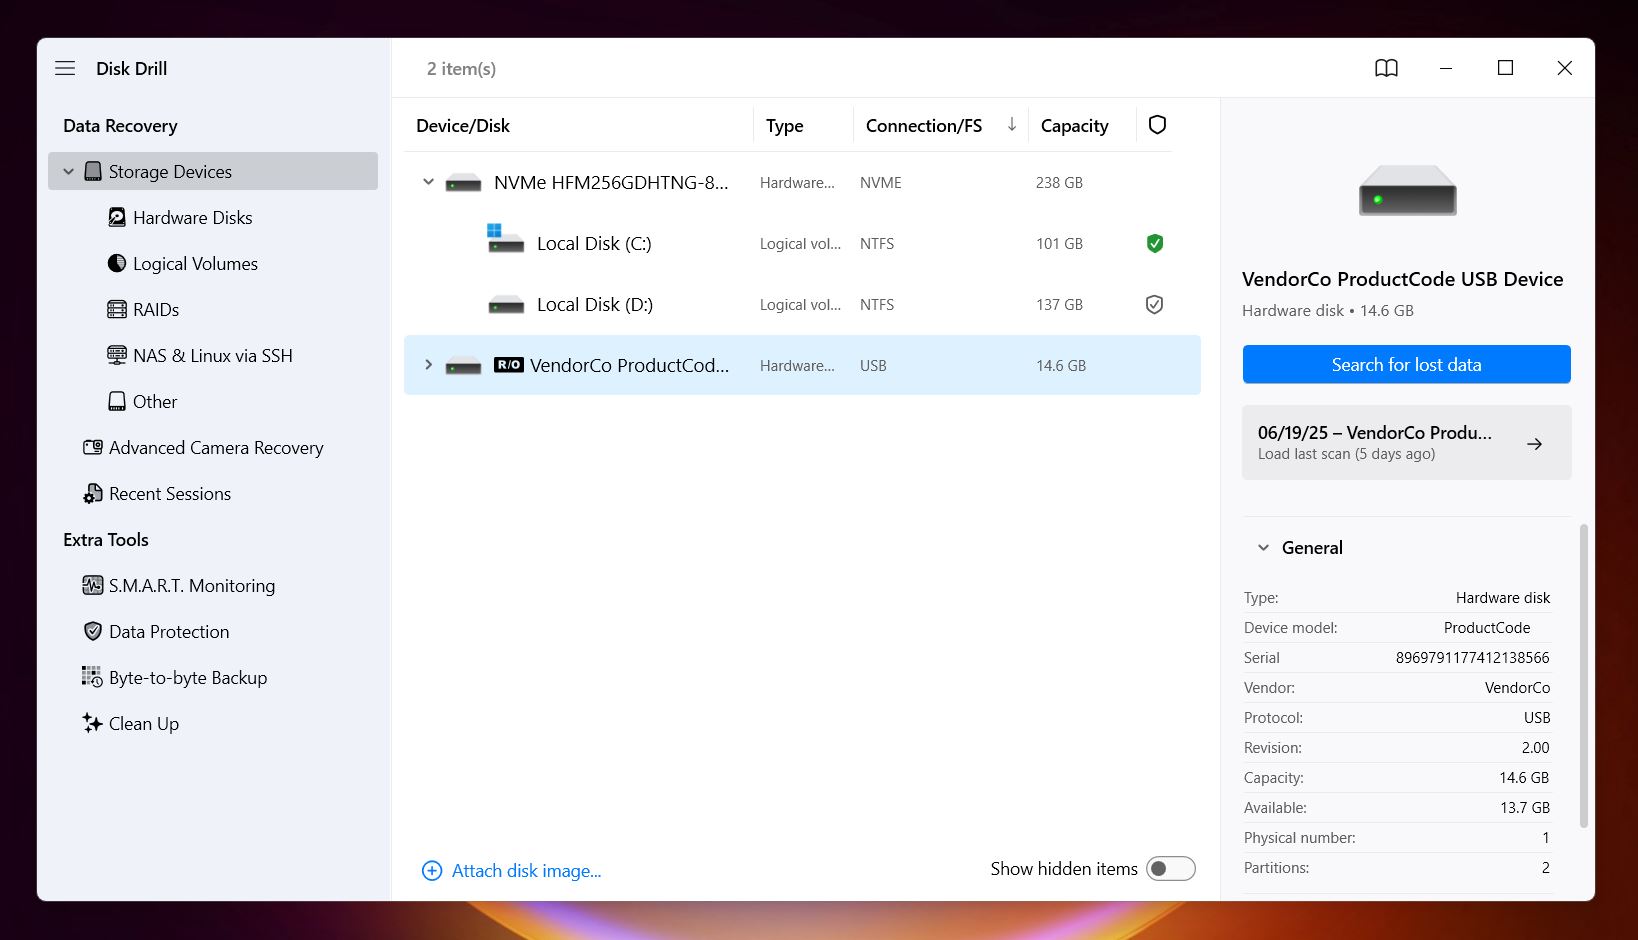 You’ll see
a list pop up with all available drives. Your exFAT one might show up by its brand name
(like Samsung, SanDisk, WD), or just by capacity. If you’re not sure, look at the
size, it’s usually the easiest giveaway.
You’ll see
a list pop up with all available drives. Your exFAT one might show up by its brand name
(like Samsung, SanDisk, WD), or just by capacity. If you’re not sure, look at the
size, it’s usually the easiest giveaway.
In most cases, you’ll want to select the entire device rather than a single partition. That gives Disk Drill more room to work with and improves your odds. - Now, click Search for lost data.
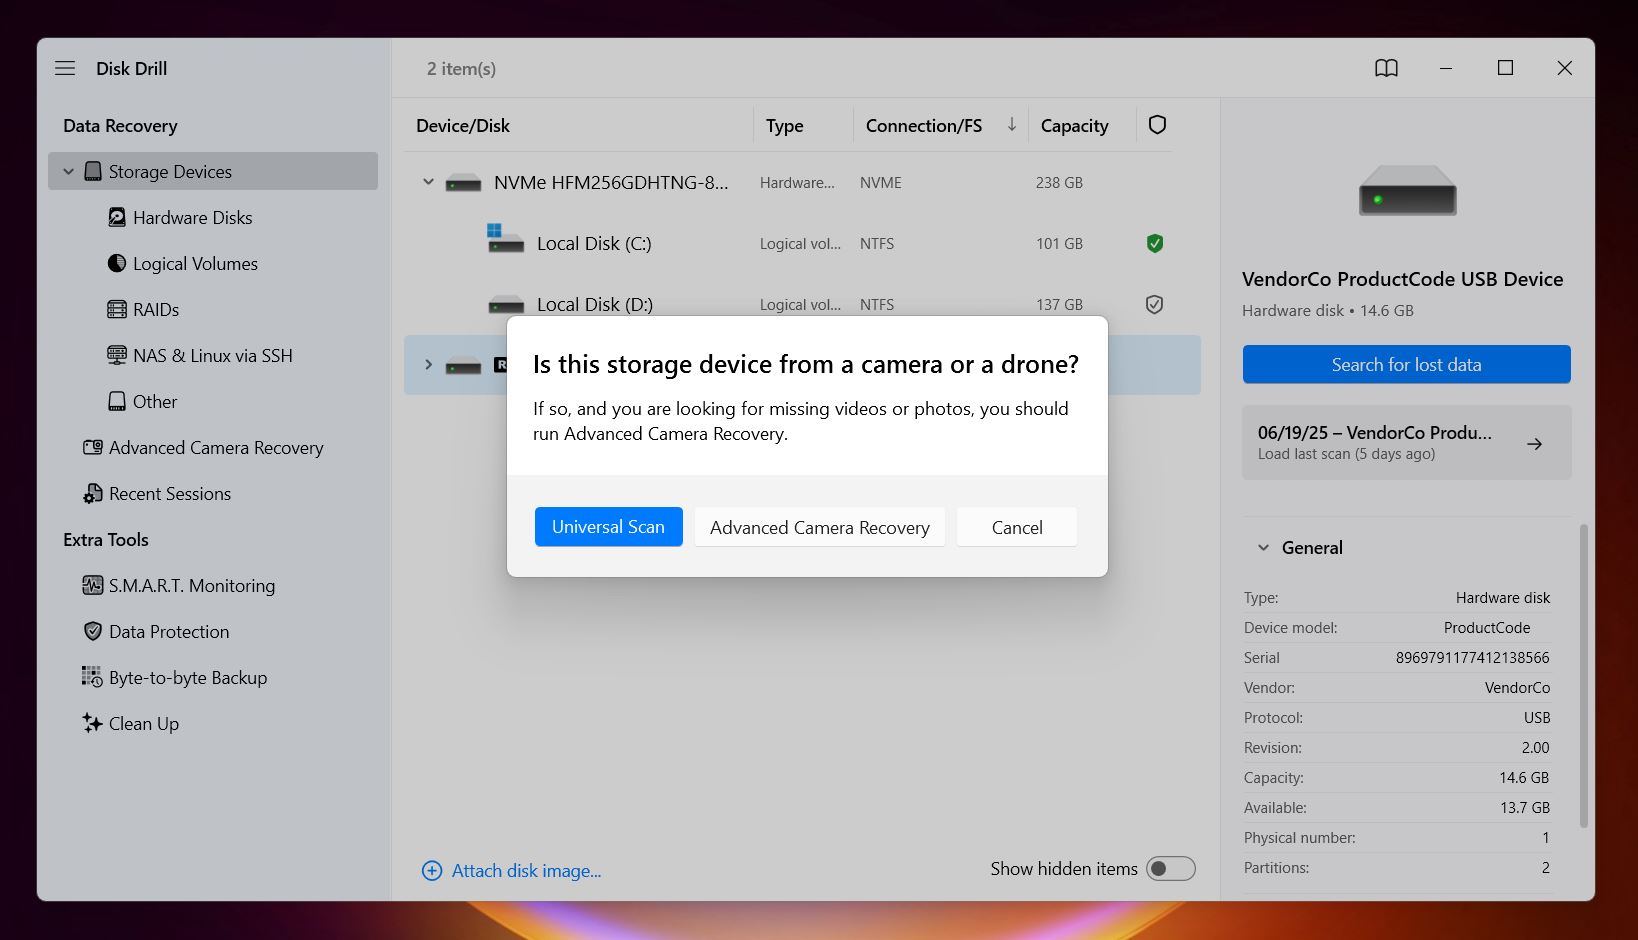 Disk Drill will offer two scan types:
Universal Scan and Advanced Camera Recovery. Usually,
Universal Scan is the way to go. It’s the default option and works
great for most deleted files, quick formats, or corrupted file systems.
Disk Drill will offer two scan types:
Universal Scan and Advanced Camera Recovery. Usually,
Universal Scan is the way to go. It’s the default option and works
great for most deleted files, quick formats, or corrupted file systems.
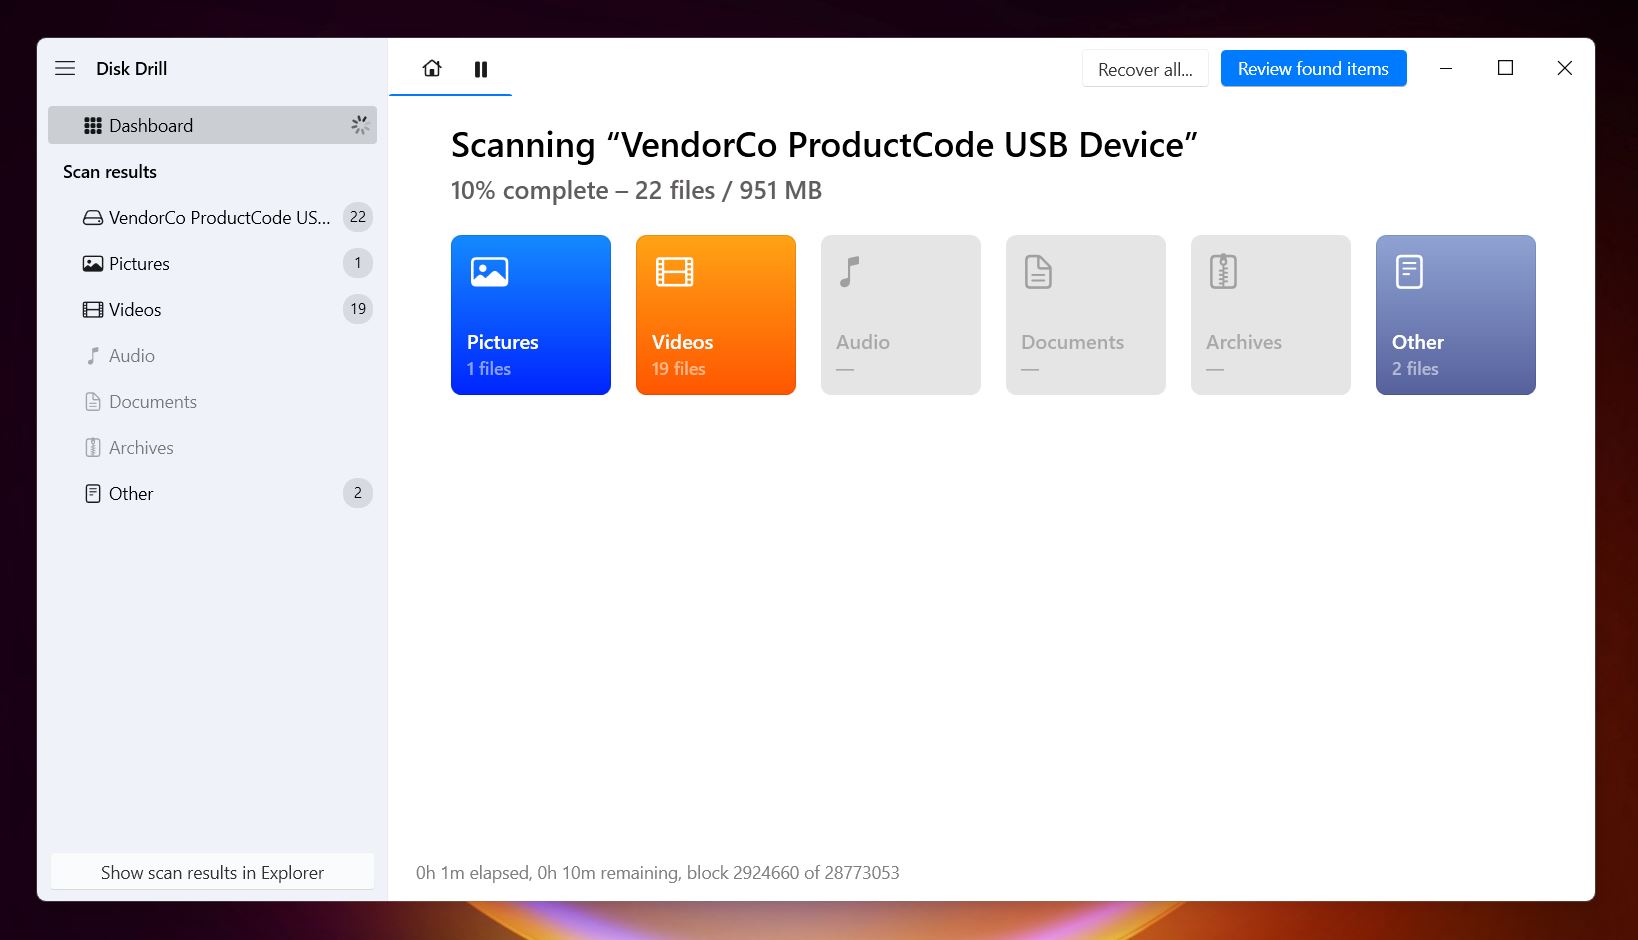
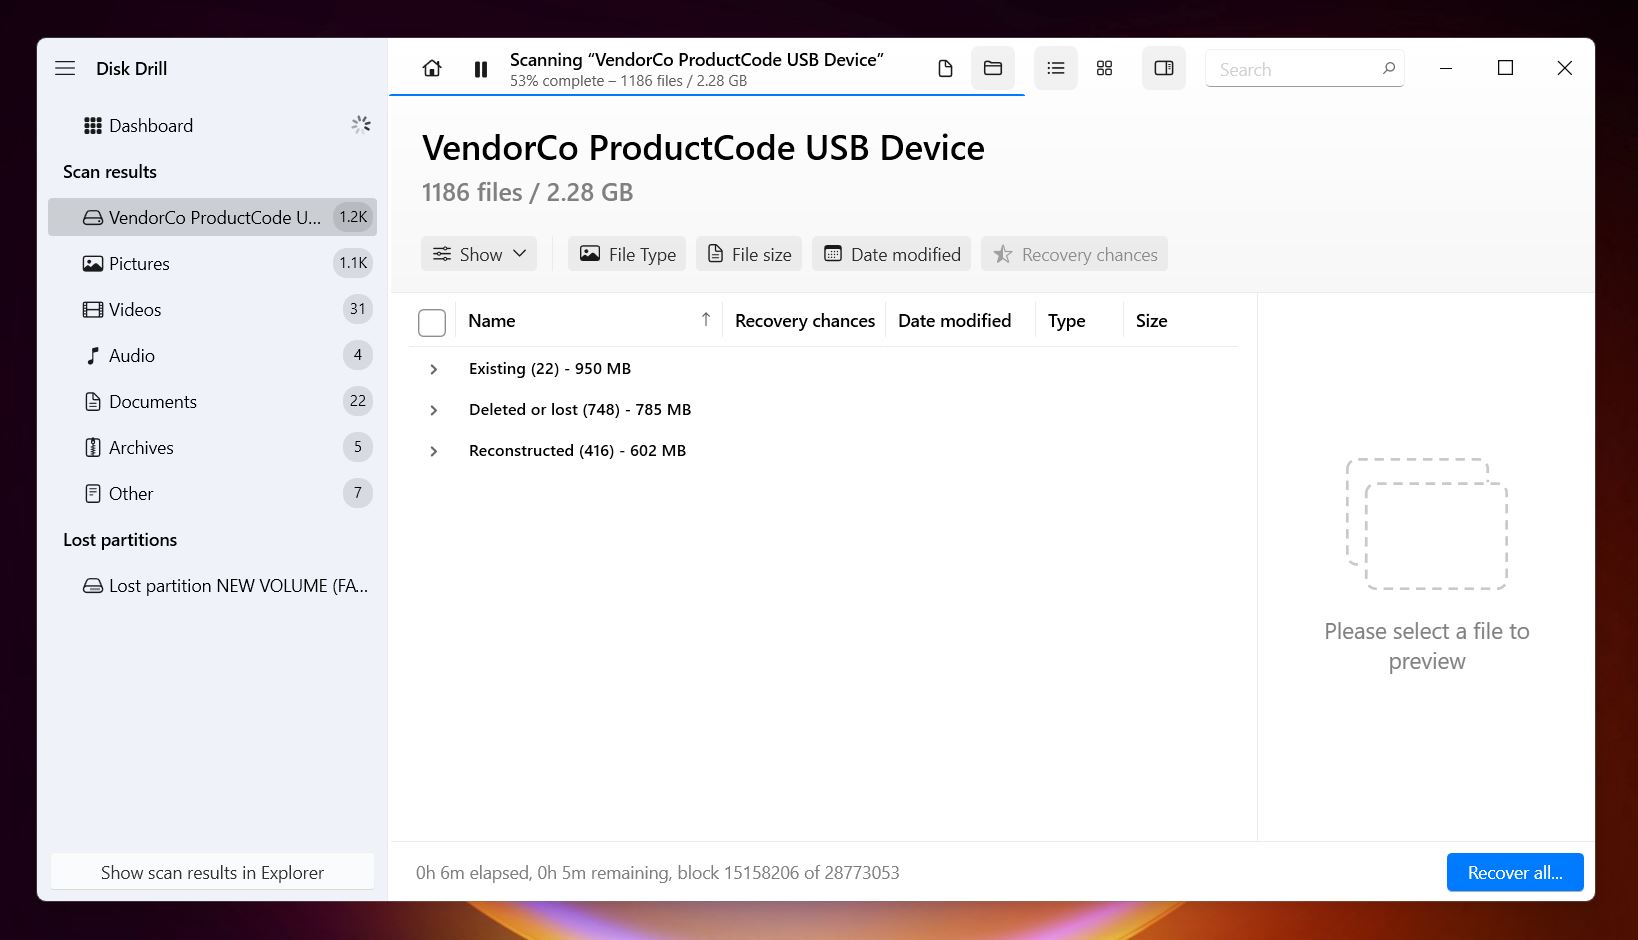
The Advanced Camera Recovery mode is more specialized. You’d only want to use that if you’re trying to recover fragmented video footage from certain cameras (like GoPros or DSLRs). - As it scans, Disk Drill will organize found files into neat categories: Pictures,
Video, Audio, Documents, Archives, and so on. You don’t need to wait for
the full scan to finish. If you’re feeling impatient, you can click into any category
and browse results while it’s still working.
- You’ll also notice three main result types: Deleted or Lost (this is
where your recently deleted stuff usually ends up), Reconstructed (if the
file system is too broken, Disk Drill pieces together files based on their signatures),
Existing (these are files still on the drive but maybe not accessible in
Finder or File Explorer due to corruption or mounting issues).
- If you’re looking for something specific, like .mp3, .mp4, .docx, whatever, use the
filters or search bar. You can type the file extension or part of a name. It helps a lot
when you're staring at a few thousand thumbnails and trying to find that one
file.
Pro tip: click the little eye icon to preview a file. If you see a clear image or the video plays smoothly, it’s a sure sign the file is intact. Disk Drill even shows a “recovery chance” rating: High, Average, or Low. High means you’re good to go. Average means there might be some issues. Low means... low.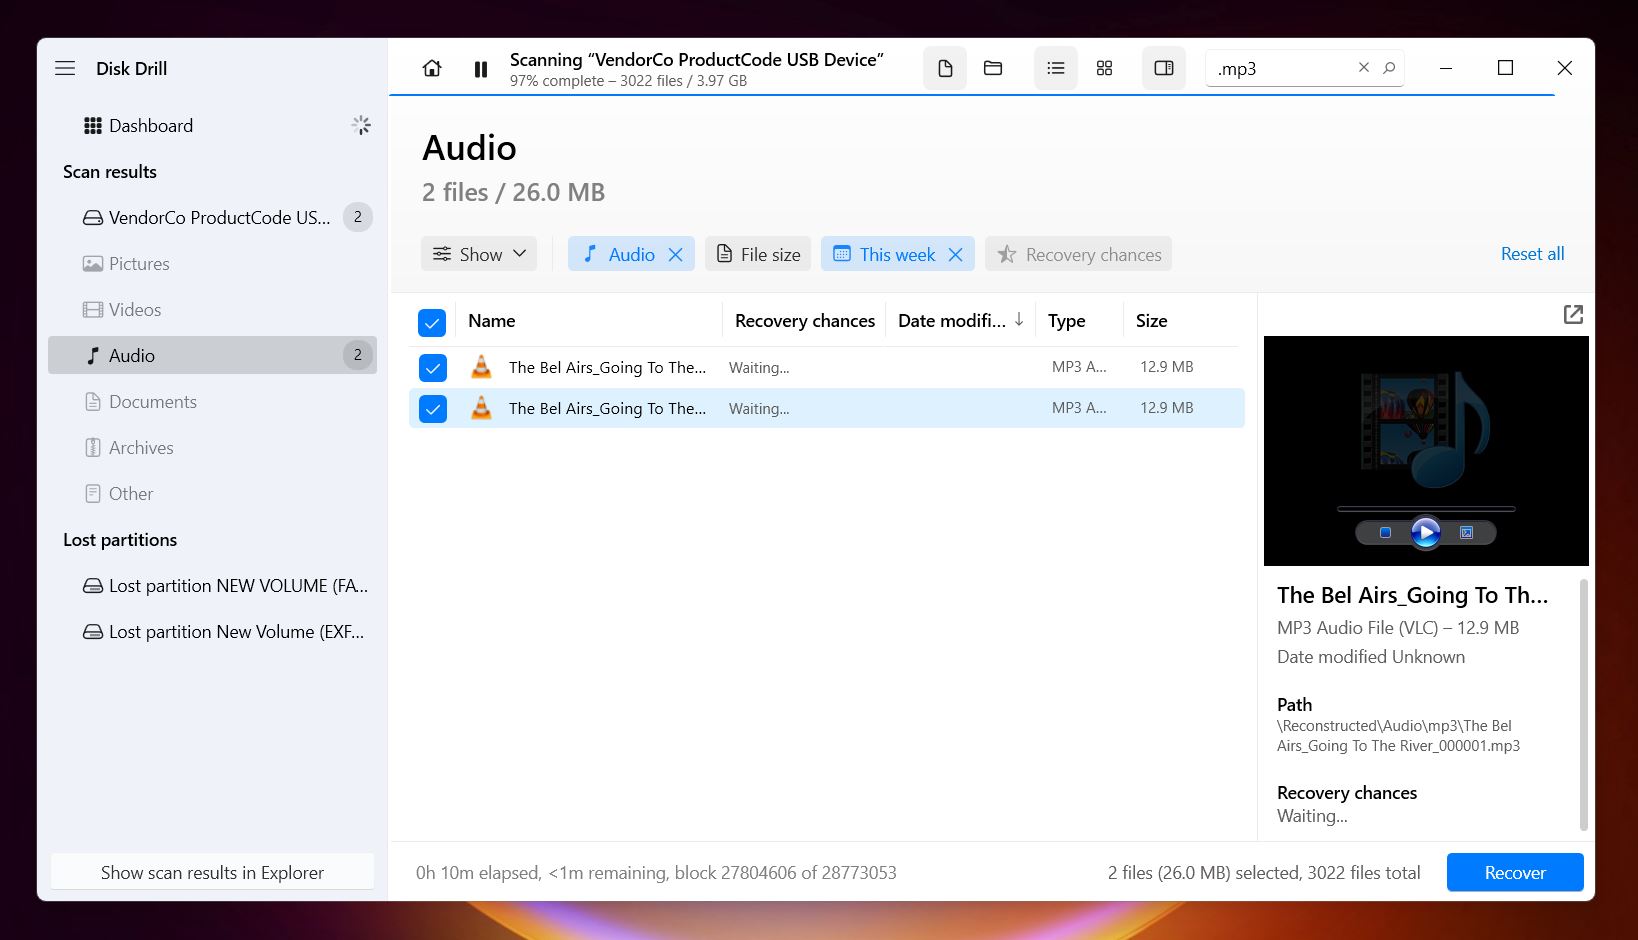
- Once you’ve picked what you want to recover, hit the Recover button. Disk Drill will ask where to save the files. Choose a different drive (never recover back to the exFAT drive itself). That’s risky and can overwrite stuff you haven’t recovered yet. The app will warn you if you try, but better to avoid it altogether.
- Give it a few minutes, and your files should start landing in your chosen folder. That’s it.
Another thing that makes Disk Drill especially handy for exFAT recovery is its built-in tools, some of which can save you when things get messy.
- S.M.A.R.T. Monitoring. Keeps tabs on your drive’s health in the background. If your drive starts failing (bad sectors, overheating, etc.), you’ll get a heads-up before disaster hits.
- Byte-to-Byte Backup (massively improved in Disk Drill 6). If your drive is acting up: slow, glitchy, you should not scan it directly. Use the byte-to-byte backup tool to clone the entire drive first. Disk Drill 6 skips bad blocks on the first pass, then goes back and re-reads them with smaller, safer steps. It’s way safer for damaged drives.
Method 2: TestDisk
💡 When to use it: TestDisk is a great choice when your exFAT partition has disappeared entirely. If you accidentally deleted a partition or messed something up while formatting, and the drive shows up in Disk Management but says “Unallocated” or there’s no file system listed at all.
TestDisk is an entirely different tool from Disk Drill. It’s not really designed to recover specific files like photos or documents (though it does have a basic exFAT file recovery feature, it’s not what it’s known for); instead, it focuses on fixing the structure of your drive. You’d use TestDisk when the partition itself is gone.
It’s a free, open-source tool, and while it doesn’t have a fancy interface, it can be powerful in the right hands. Here’s what TestDisk can do:
- Recover lost or deleted partitions.
- Rebuild broken or corrupted partition tables.
- Restore drives that aren’t showing any file system.
- Undelete files from exFAT (though it’s pretty basic, Disk Drill is much better for recovering specific files).
TestDisk runs entirely in the command line; there’s no graphical interface, no buttons to click. So yeah, you’ll have to be a bit more hands-on. It’s not hard once you get the hang of it, but it does feel old-school. Arrow keys, Enter, lots of reading prompts carefully.
Here’s how you can use it to try recovering your lost exFAT partition:
- Head to the official TestDisk
website and download the version for your OS. It comes in a zip file, no
installation needed. Just extract and run the
testdisk_win.exe.
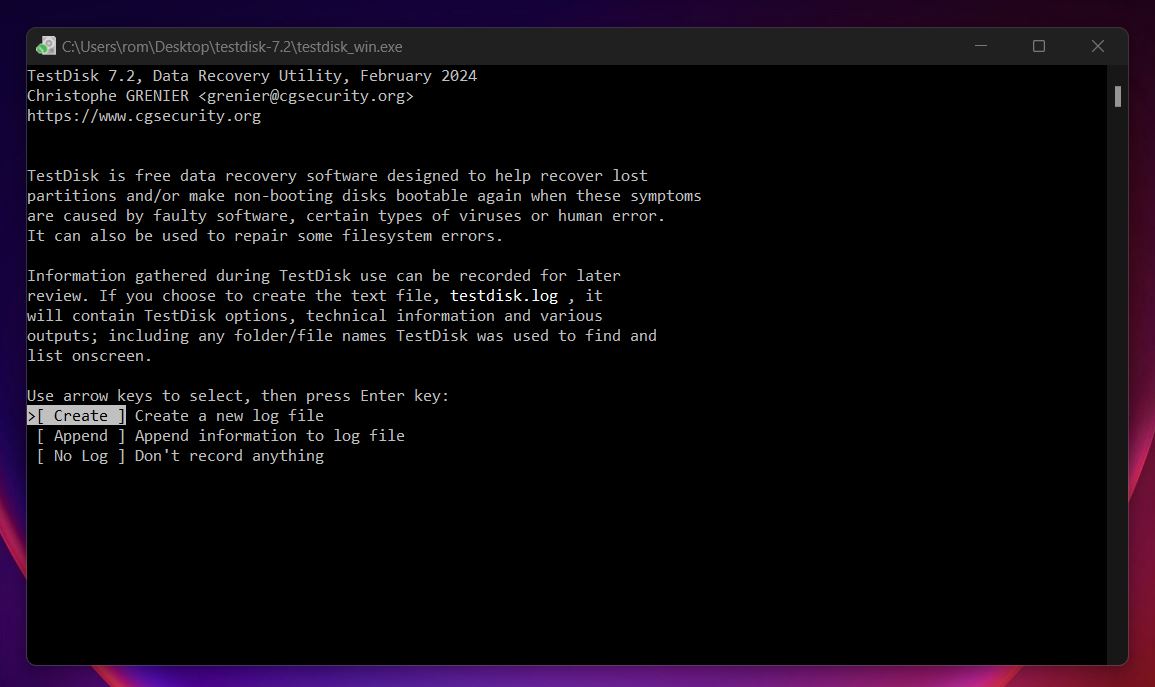
Double-click the executable or run it from Terminal/Command Prompt with admin rights.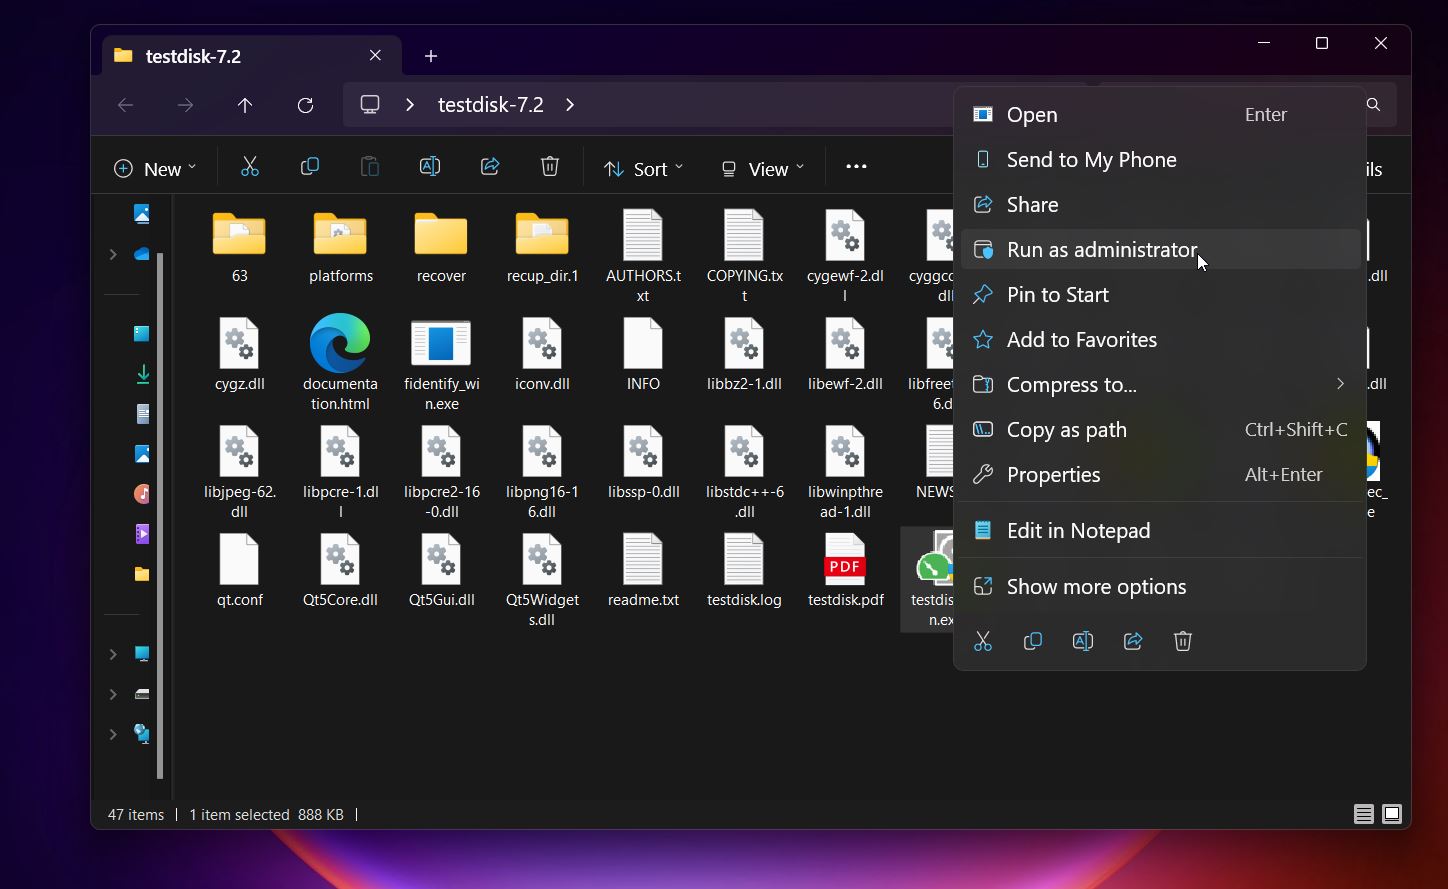 You’ll be greeted with a
text-based window.
Hit Enter to create a new log file (or skip if you prefer).
You’ll be greeted with a
text-based window.
Hit Enter to create a new log file (or skip if you prefer).
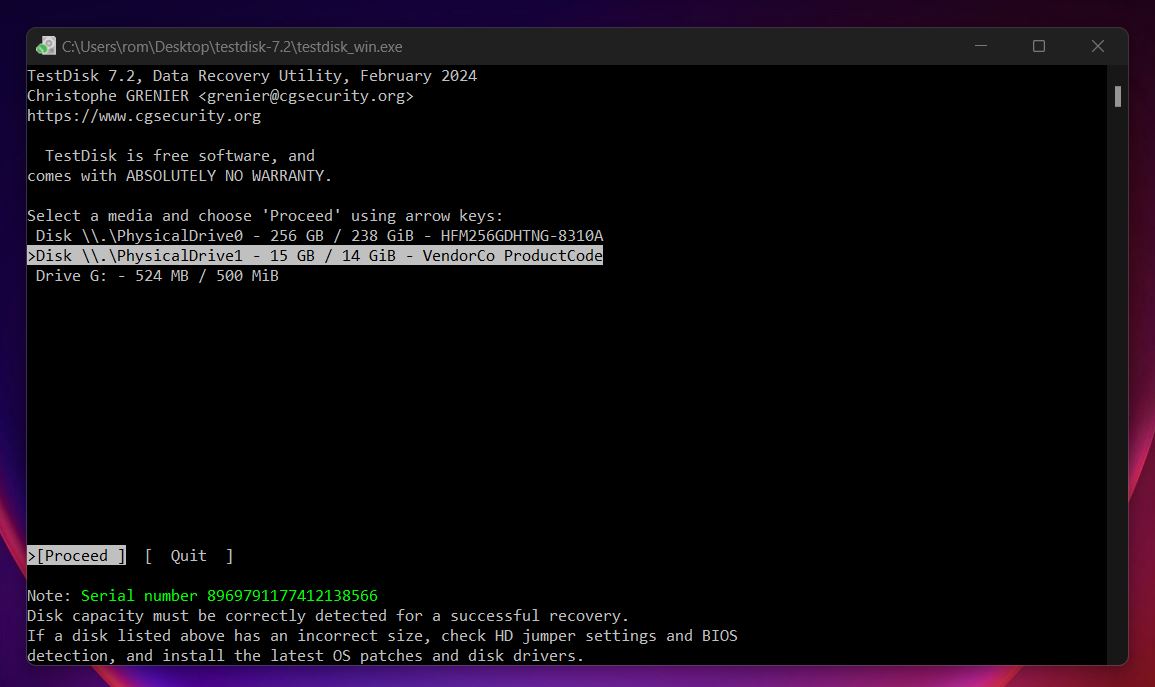
- Use the arrow keys to highlight the affected disk (not a partition - choose the whole
physical disk). Press Enter.
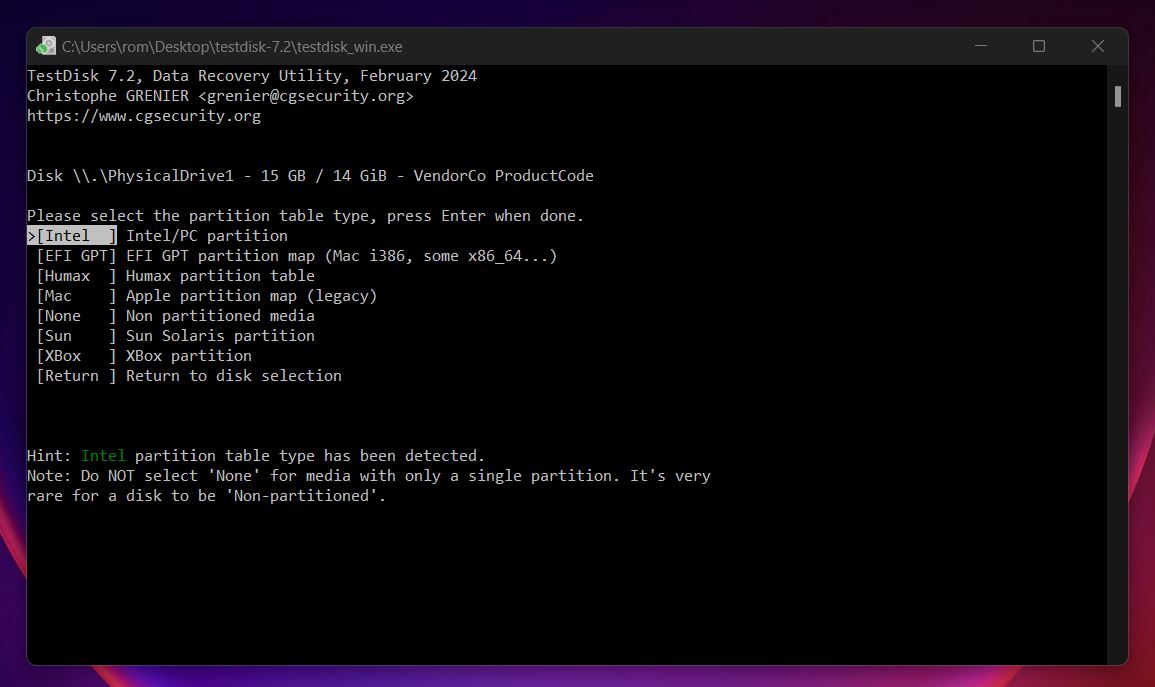
- For most modern systems, TestDisk will auto-detect the correct type (usually Intel/PC or EFI
GPT). Just go with what it suggests unless you know otherwise.
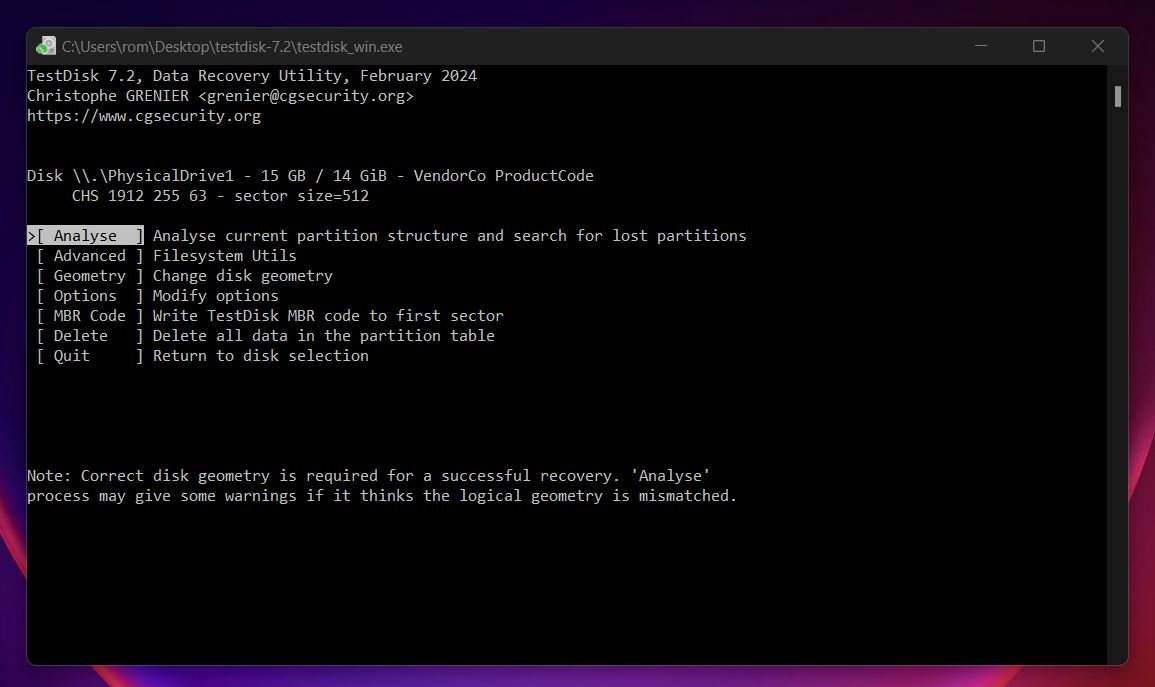
- Choose “Analyze”. This starts the scan to detect lost
partitions. After the Quick Search, TestDisk may already show the missing exFAT partition.
If not, go for Deeper Search.
- If TestDisk finds your exFAT volume, it’ll list it in green. Highlight it, then press P to see the file list. If your folders and files show up, you’re in good shape.
- If everything looks right, go back, select the partition, and choose Write to restore it. After that, reboot and check if the drive mounts normally again.
TestDisk is useful for a pretty narrow set of problems, but when you're in that zone, it's one of the best tools you can use. That said, it requires a lot of patience and a careful eye.
Another thing worth knowing: TestDisk comes bundled with another tool called PhotoRec. It’s focused entirely on file recovery. PhotoRec doesn’t care about the file system at all. It scans the raw space on the drive, looking for file signatures. PhotoRec won’t give you file names or folder structure, and it can’t preview anything. You’ll get hundreds (sometimes thousands) of files named like “f1234567.jpg” dumped into a folder. No dates, no original paths. Just raw files recovered from the drive.
Still, like TestDisk, it’s completely free, works on pretty much every OS.
How to Recover Deleted Files from exFAT Without Third-Party Software
Usually, for 9 out of 10 people, recovery software is what actually gets their files back, that’s why we started there. Tools like Disk Drill and TestDisk do the heavy lifting when your exFAT drive goes sideways.
But just in case, let’s talk about the built-in options.
To be fair, most people looking up exFAT recovery have already poked around a bit. You’ve probably checked the Recycle Bin, maybe peeked into File History, or tried a few random right-clicks. Still, it’s worth covering these methods quickly, just to be thorough.
Method 1: Check the Recycle Bin
💡 When to use it: Check the Recycle Bin if you deleted a file from your exFAT drive without using Shift + Delete, and the drive supports the Recycle Bin.
As you may know, on Windows, when you delete a file, it usually goes to the Recycle Bin first. It’s kind of like a second chance before the file is actually removed from the drive.
Here’s how to recover deleted files from an exFAT drive using the Recycle Bin:
- If you deleted files from an external exFAT hard drive, connect it to your computer first.
- Open the Recycle Bin from your desktop (or type “Recycle Bin” in the Start menu).
- Then look through the list. If your files are there, you’re in luck.
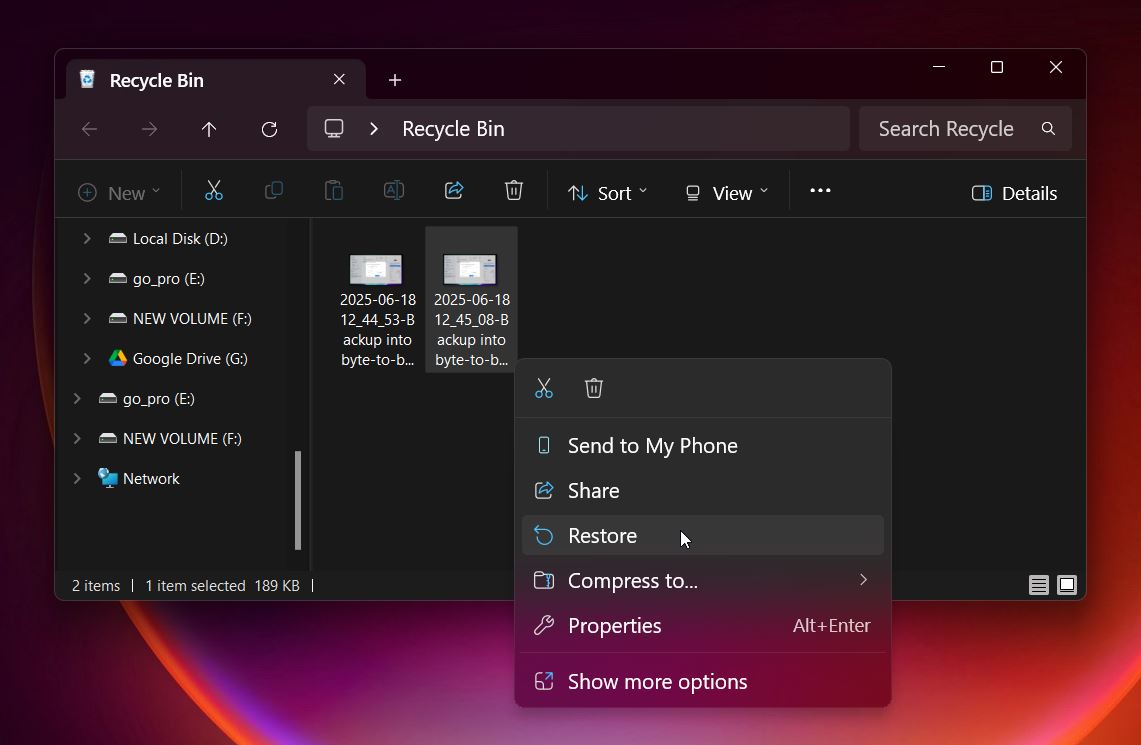
- Right-click and hit Restore, and they’ll go right back to where they were.
But (and this is important) most external exFAT drives, especially USB sticks and SD cards, don’t use the Recycle Bin. If you deleted something from those, chances are it’s already marked as free space. If your file’s not in the Recycle Bin, you’ll need proper data recovery software like Disk Drill to scan the drive.
Method 2: Use File History
💡 When to use it: Try this if you had File History enabled before the data loss happened. It only works if the deleted files were part of a folder that was being backed up, and the drive was connected long enough for Windows to catch a snapshot.
File History is Windows’ built-in backup feature. It automatically saves versions of your files so you can restore them later, even if they’ve been deleted or overwritten. The catch? It has to be turned on before you need it. If it wasn’t set up, there’s nothing to recover here.
Here’s how to check:
- File History needs an external drive where it saved the backups. Plug that in first.
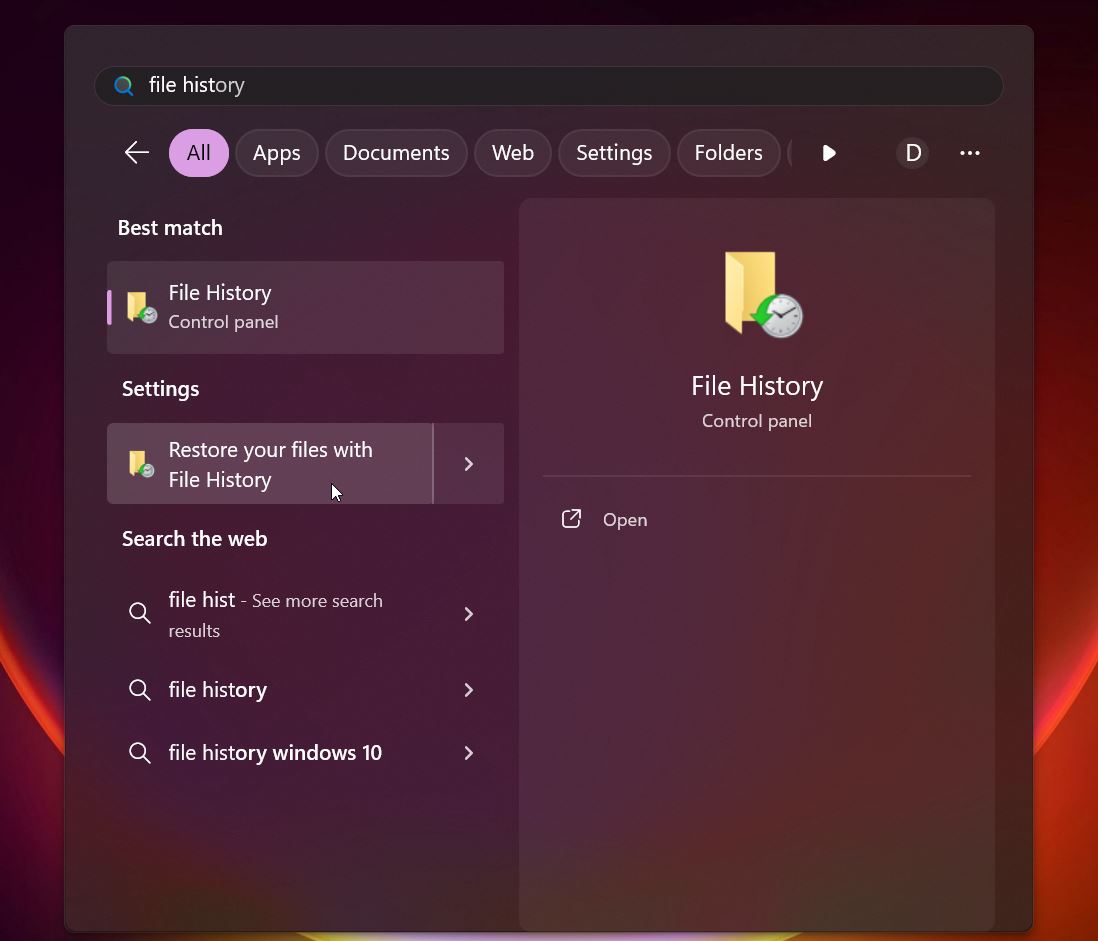
- Open the Start menu and type “File History,” then click Restore your
files with File History.
- Use the arrows at the bottom to move through different backup dates.
- Navigate to the folder where your lost file used to be.
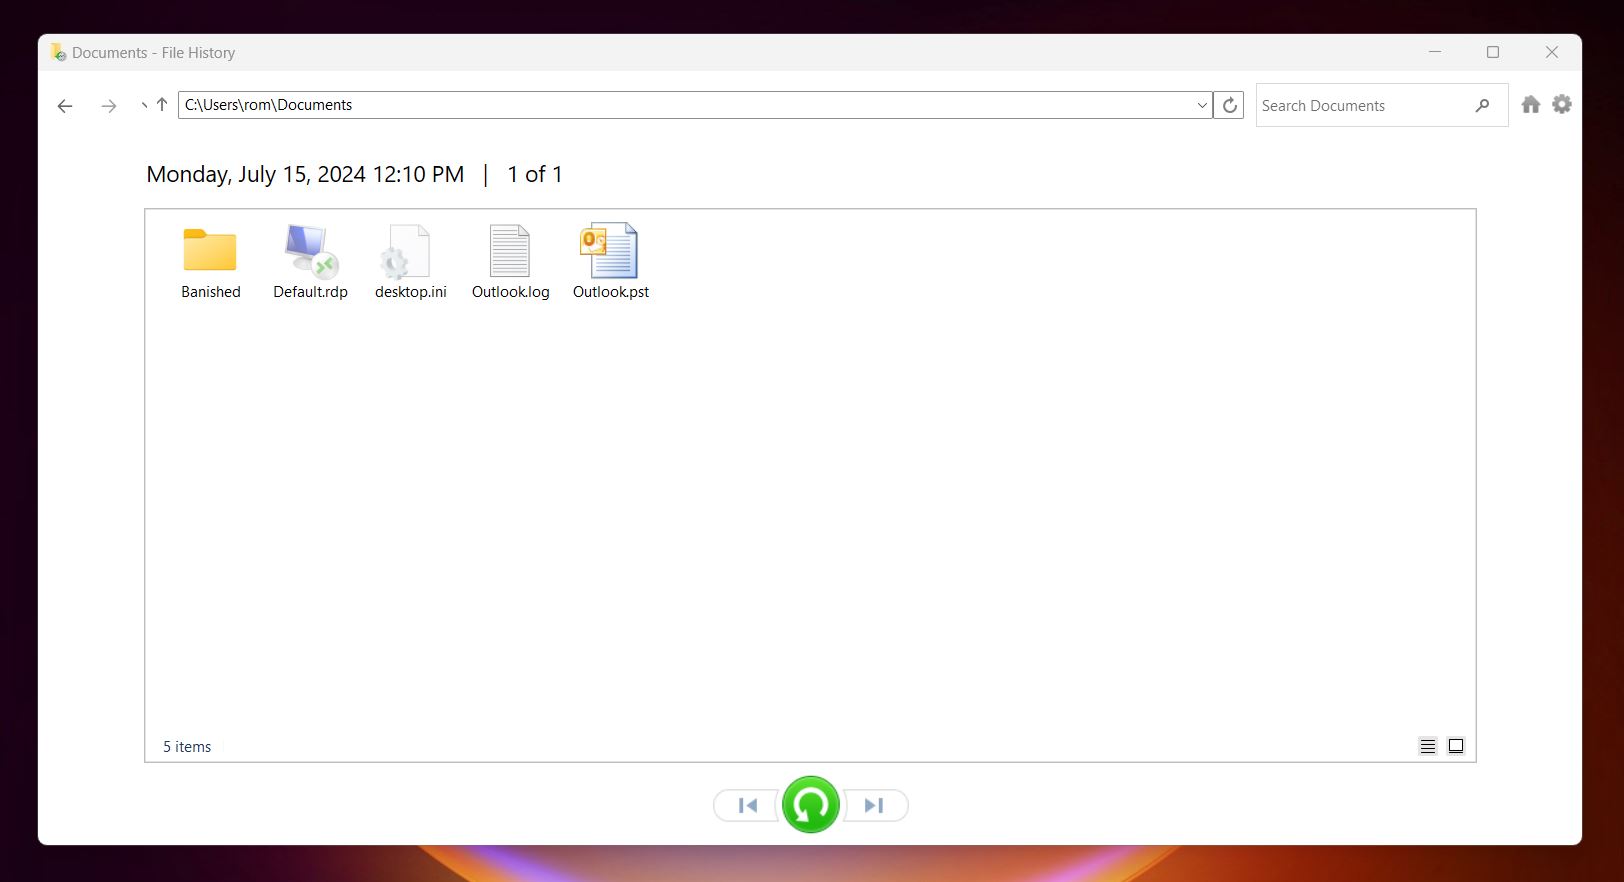
- Found it? Select the file and click the green Restore button. That’ll send it back to its original location. Or, right-click and choose Restore to if you want to send it somewhere else.
File History doesn’t always include external drives like your exFAT one, but if you copied the files to your PC at any point and File History was watching that folder, there’s a chance they’re still in the backup. If not, no worries, recovery software is still your best bet.
💡 Quick tip: If you have any cloud-based backup running, now’s the time to check it. OneDrive comes preinstalled on most Windows 10 and 11 machines and may have silently backed up your Desktop, Documents, or Pictures folders. Also, check Google Drive, Dropbox, or any other sync service you’ve used. Sometimes your files are already saved elsewhere, you just forgot they were being backed up.
Can You Recover exFAT Files on a Mac?
Yes, you can absolutely recover exFAT files on a Mac. The exFAT format is natively supported by macOS, so as long as the drive is physically working (even if the files aren’t showing), you’ve got options.
Actually, you’ve got the same exFAT data recovery tools we already covered. Disk Drill and TestDisk both work on macOS, so you can follow basically the same steps. Just make sure your exFAT drive shows up in Disk Utility. If it’s listed there (even if unmounted), recovery software should be able to scan it.
Final Words
We’ve seen a lot of data loss cases involving exFAT drives over the years, pretty much every type you can imagine:
- Accidentally (or intentionally) deleting files
- Formatting the drive without a backup
- Power cuts or disconnects mid-transfer
- File system corruption
- Bad sectors building up over time
- Physical damage
- Even viruses messing with the drive’s structure
But the good news, in our experience, is that most exFAT data loss can be recovered, especially if you catch it early and stop using the drive right away. Yes, of course, there are situations where the drive is too far gone physically (clicking noises, no detection at all) and DIY recovery is off the table. That’s when you’ll need a professional data recovery lab.
But those cases are the exception, not the rule. The absolute majority of exFAT-related problems are way less severe: accidental deletion or a quick format. And guides like this are usually enough to walk you through fixing it yourself.
The key is to act early, avoid writing new data to the drive, and use the right tools for your situation. If you’ve made it this far, you’ve already got a solid head start.