|
Dongle installation
|   |
|
Dongle installation
| |
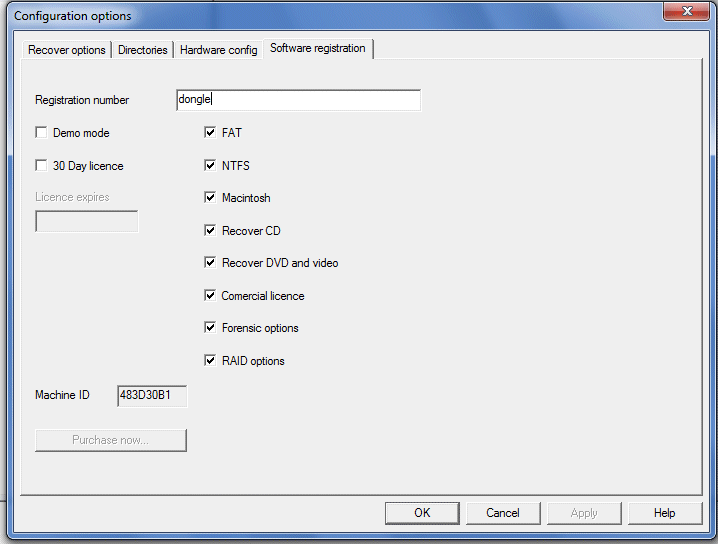
When a dongle is used, the registration number (in the Configuration menu) is set to "Dongle" (upper or lower case) and the dongle must be inserted in a USB port.
When first inserted, the device drivers must be loaded. This is a simple operation, as described below. It does vary between operating systems, but the following is a general guide line.
There are two current dongles, older ones are black, current ones are blue. The older black dongle was released pre Windows 8 and the drivers have not been fully updated to be signed. This can mean complex installation on Windows 8 and 10. All new dongles being sold are blue./
Windows - 10 and Blue dongle
Recent tests with Windows 10 indicate that the dongle is now detected automatically, and no additional drivers are required. The device (looking with Windows Device manager) is seen under
Universal Serial Bus controllers
USB Serial converter
Looking at details, the manufacturer is FTDI, and driver provider is FTDI
Windows 7-8
Driver downloads. A separate download is required for the dongle drivers. Please go to the following link link to download the drivers. The link is near the bottom of the page and the downloaded file is CnWDongle.msi This is a standard Microsoft Install file and will by default save the drivers in the program files(x86) CnW recovery\CnW directory. Drivers will not need updating between versions of CnW.
Insert the dongle in the USB port and Windows will detect new hardware. If it cannot find the driver, or give you a choice of where to search then
Go to Control Panel, System, Device manager, or device drivers
In this column, you should see the DL-D device with a yellow question mark, indicating no driver found
Select the device and the Update driver
In all cases ...
On the first menu do not search the internet for drivers
On the second menu, select the option to install from a specific location
The location to install from is in the program files, where CnW has been loaded. By default this will be
c:\program files\Cnw Recovery\cnw\CDM20802 WHQL Certified
or
c:\program files (x86)\Cnw Recovery\cnw\CDM20802 WHQL Certified
The driver is not certified, so please accept the next dialog warning box. Do not be put off by the red colour.
Installation will then take place. It is not necessary to reboot the PC after installation.
The installation is only required the first time the dongle is loaded on a new PC.
If the software is run without the dongle being installed, it will only operate in demo mode, ie no files will be saved.
The dongle is not a CnW produced device and the following link is from the manufacturer which can be used if there are problems with the driver installation try the www.ftdichip.com site. The dongle is based on the FT232 device, but has a non standard product ID, and so the .INF files have been modifed specially to handle this device
Windows 7 64 bit compatibility. The CDM20802 version of the driver, and CnW supplied .inf files are comptaible with Windows 7-64 bit
Black dongle, Windows 8 and 10
Unfortunately the installation of Windows 8 and 10 is a bit more complex. The current driver for the dongle is not signed by the manufacturer and so a process is required to allow Windows to load an unsigned driver. This is a few simple stages, but it does require rebooting the PC, and so these instructions should be printed out to aid the process.
1. Windows Key + R
2. Enter shutdown.exe /r /o /f /t 00
3. Click the “OK” button
System reboots here
4. System will restart to a “Choose an option” screen
5. Select “Troubleshoot” from “Choose an option” screen
6. Select “Advanced options” from “Troubleshoot” screen
7. Select “Windows Startup Settings” from “Advanced options” screen
8. Click “Restart” button
9. System will restart to “Advanced Boot Options” screen
10. Select “Disable Driver Signature Enforcement”
11. Once the system starts, install the drivers as described above
You will asked to accept an unsigned driver. The installation of the drive does take a few minutes, so do not panic too much.